ORC Spring ’21 Week Two: Faux Built Ins (Pt. 1)
You can read all my posts about this One Room Challenge project here: Week 1 | Week 2 | Week 3 | Week 4 | Week 5 | Week 6 | Week 7 | Week 8. You can also watch the whole ORC process on my Instagram highlight. Don’t forget to check out the reveals of the 20 Featured Designers and the rest of the Guest Participants!
For this One Room Challenge, I thought it would be smartest to tackle the most ambitious part of my room makeover first: the faux built-ins. Eat the frog as they say. I’m not sure why they say that and what those poor frogs did to anyone but I digress.
But Why Tho?
During my last move, I had five suitcases filled with books. These were in addition to several boxes filled to the brim with books. The box with my cookbooks burst because it was so heavy. My friends moved my couch and found a stack of books nestled under it. They then took apart my bed and what do you know? More books tucked under the bed!
I live across the street from a public library with weekly used book sales that cost $1-3 each. My job has a monthly book club where they reimburse the cost of the books. I use it as a chance to support my local bookstores. DC also has a bunch of free little libraries across the city. My favorite is near a bookstore that puts the advanced copies and gallys that they aren’t allowed to sell. And this was all before the Polly Pocket hit and gave me more free time to read.
That’s all to say that I have amassed quite a collection of books. With this new apartment, I have the space to build a book nerds dream: a proper home library. Eat your heart out, Belle.
I was initially going to makeover my dining room for this challenge. But then I realized it would make more sense to put the “library” in the living room. As I mentioned in the previous post, my living room is quite big, and I felt like I wasn’t utilizing the space to the best of its advantage. Nor had I found that “wow” factor that grounded the room and tied it all together. What’s more wow-inducing than a set of floor-to-ceiling built-ins as the room's focal point? So I threw out all my plans for the dining room and moved all my focus to the biggest room in my home. What could possibly go wrong?

The wall where the built-ins are going. A fresh canvas for all my ideas!
Curse You, Supply Chain
I’ve seen videos of people hacking the IKEA Billy bookcases to make them look built-in. This apartment is a rental, and I cannot make permeant changes. I also learned how to use my first power tool six months ago, so this seemed the best route. One minor snag: Billy had left the building.
There was not a single Billy bookshelf to be found at the three IKEAs closest to me. Then I was like, okay…maybe I should make a road trip to NYC. I checked the Brooklyn IKEA, and sure enough, they were out too as was Tempe. And Burbank. And Palo Alto. And New Haven. Aaaaand Jacksonville. As well as Atlanta. Pittsburgh, Memphis, Houston, Seattle? Nope, Nope, Nope. I’d looked everywhere, man and no one could find Billy. The global pan dulce had put a strain on IKEA’s supply chain and the most beloved bookcase in the world was back-ordered.
Indefinitely.
But I didn’t have indefinitely; I only had eight weeks to complete this challenge. I went to Facebook Marketplace and Craigslist to see if anyone was selling theirs and no go. The first step of my ORC project and I couldn’t even get the main supplies I needed. I went to Facebook Marketplace and Craigslist to see if anyone was selling theirs and no go.
I even thought about building my bookshelves from scratch. Once that temporary break with reality was over, I started looking for other bookcases I could use. I mean, what’s so special about Billy? It’s literally a plain bookcase. How hard can that be to find? Apparently, not that hard because my Target had them for $35 (half the price of the Billy) and did same-day delivery with Shipt.
Mortimer, we’re back!
Pro tip: When moving, pack you heaviest items in your suitcases since they have wheels. Your back and shoulders (and knees and toes) will thank you.
The Design Plan
My plan for these built-ins was super simple: floor to ceiling, all white, simple thin trim. I knew I would overload it with books and decor, so I wanted to keep it as plain as possible not to overwhelm the room. And then I got an idea.
That wall is the only logical place to mount my TV so I would have to build the shelves around it. But the TV is such an eyesore and detracts from the room's design. I don’t watch enough television to justify investing in a Frame TV so I had to figure out another way to camouflage it. So I came up with this solution: an oversized piece of art to hang over the TV a release mechanism to hang the piece up and take it down easily. And so my vision for the built-ins was created:

My plans and measurements for the builtins
Creating the Built-Ins
This is the most ambitious project I’ve ever taken on. I’m doing this project by myself, and as someone without a lot of (read: no) construction experience, I wanted to make it as simple as possible. After browsing Pinterest and seeing how other DIYers had built theirs, I found inspiration from Pinterest and created my own process. Here it is:
Measure your space. Measure your space! Then measure it again. Height, depth, width and don’t forget to account for the base molding. Your space will be completely different from mine so only use these directions as a reference, not a blueprint.
Construct your store-bought shelves. This will be the easiest part of this project so savor it.
OPTIONAL: At this point, you should construct the base for the shelves to rest on if you are not ripping out your base molding. This will help the bookcases to be flush to the wall. My base molding is 7 inches tall which was…a choice. Not the one I would have made but here we are. I didn’t want to lose those precious inches off my builtins so I put the shelves directly on the floor.
OPTIONAL: Modify bookshelves. You may have noticed that I have this interesting ledge on this wall. I’m not sure what its purpose is but it’s there. Getting on my nerves. To get the floor to ceiling look, I bought 4 additional shorter bookcases, and using my circular saw, I modified the shelves by cutting off a few inches on the top and then cutting into the sides to accommodate the ledge once they were stacked on top of the 4 taller, lower level shelves that I built.
OPTIONAL: Paint the back wall. If you are going to have parts of your wall showing this is the time to paint it. Because I modified the top bookcases, I could not use the backing that came with it, so I painted the visible walls using Clare Paint’s Fresh Kicks.
This is the point if you have any wiring you need to do i.e. cutting a hole to accommodate for an outlet. Once the bookshelves are secured you won’t be able to after the next steps. I have one outlet hidden in this wall. I put two extension cords in both outlets just in case I ever needed to put any additional electronics here in the future.
Secure the bookcase to the wall using the anti-tip kits.
Add trim to finish the built-ins. I bought pre-primed trim at the Home Depot because I was already planning on painting the shelves white. They were a little more expensive than the unprimed trim but once I calculated the cost of a bucket of paint plus the time it was actually a bargain. I used my circular saw to cut the trim to the correct length and a Gorilla Hot Glue Gun to attach it to the bookcase. I started from the base doing the horizontal rows, then adding the vertical columns, and then repeating it on each “level”. This allowed the trim on the bottom levels to support the trim on the next level. This part took a lot longer than I expected. Nearly a full day, in fact. It probably would have gone faster if I had someone helping so we could divide and conquer but, panorama and I wasn’t fully vaccinated yet so I had to make it do what it do.
OPTIONAL: Some people will cover up the holes in the bookshelves to make them look more custom. I decided not to do this because I knew I would constantly be rearranging my shelves to accommodate books and decor. If you want to do this you can use caulk or spackle to fill them in.
After this, I cut a piece of MDF board to place on top of the shorter shelves to hide the gaps. I’ll paint this in Fresh Kicks later so it doesn’t stick out.

Pro Tip: Layout the pieces of whatever furniture you are building so you can visually plan
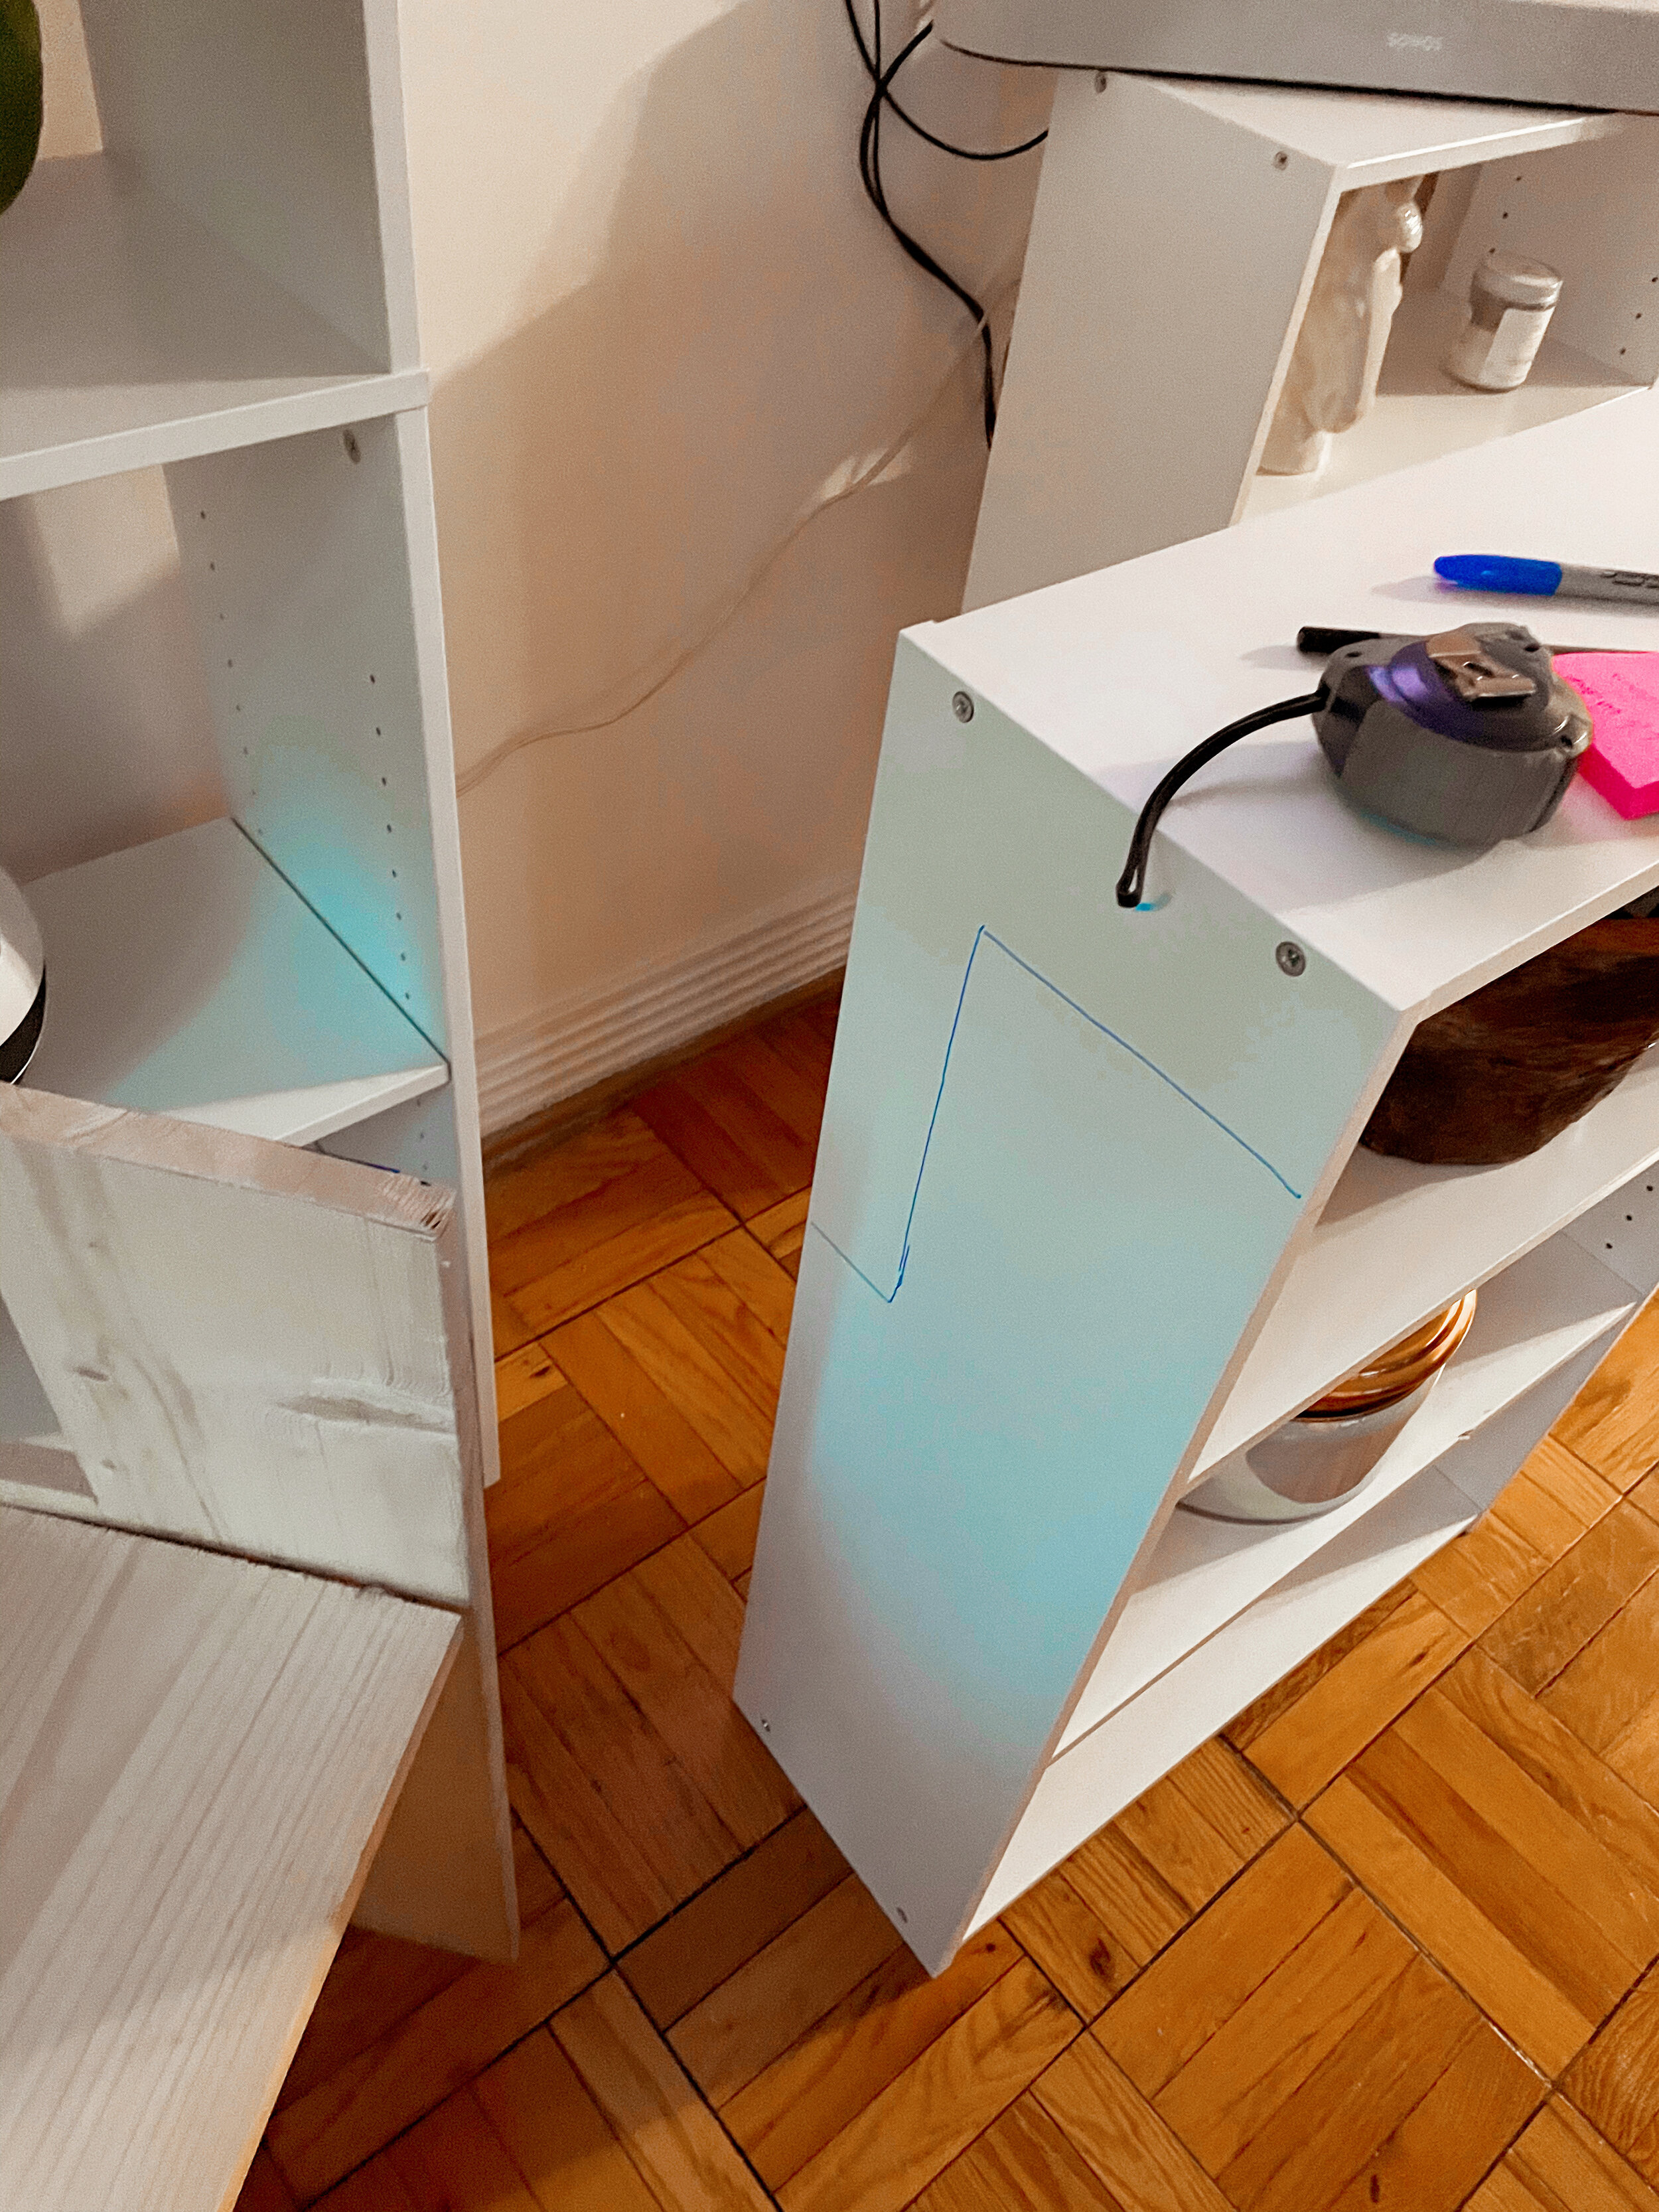
Drawing the cut line in order to modify the short bookcase for the top level of the built-ins.

Painting the walls and ceilings with a Fresh Kicks from Claire

Apply the 2 inch trim, I ended up using 3 inch trim for the bookcases that had supports in between.

You can see the common board that I placed in between the bookcases to add additional support. Don’t mind the dust.

Adding trim gives is a subtle change that makes a huge impact. Before the trim….

After the trim. See the difference?
Next Week
Install picture light
Apply caulk to bookshelf seams
Build TV cover art + figure out how to hang it
Unpack and organize books

BRB learning how to caulk

The picture light I’ll hang in the center of the bookcase

Do you sort by color, genre, Dewey Decimal or read vs. unread?
Resources
3 Shelf Bookcase (I used 6 total and modified 4 of them)
5 Shelf Bookcase (I used 4 total)
1 in. x 2 in. x 8 Primed Trim Board
1 in. x 3 in. x 8 Primed Trim Board
MDF Board
Sconces (I ended not using these but they were SO gorgeous in person. I was so sad to send them back.)
Clare Paint in the color Fresh Kicks (Get $10 off your first $150+ paint order using my link!)
This post contains affiliate links. If you make a purchase through one of my links, I may receive a small commission at no cost to you.
Don’t forget to check in on the 20 Featured Designers and the rest of the Guest Participants to how their projects are coming along!
