ORC Spring ‘21 Week Four: Lamp DIY and Painting
You can read all my posts about this One Room Challenge project here: Week 1 | Week 2 | Week 3 | Week 4 | Week 5 | Week 6 | Week 7 | Week 8. You can also watch the whole ORC process on my Instagram highlight. Don’t forget to check out the reveals of the 20 Featured Designers and the rest of the Guest Participants!
Go big or go home. That was the theme for this week’s round of the One Room Challense. If you’ve read my other posts regarding my apartment, you know my only three complaints about this apartment are 1. The weird ceiling ledges in each room, 2. My building controls the temperature and they like to keep it set to “boiling”, and 3. The color they chose for the walls.
It was only a few months ago that I learned that there were different shades of white and depending on which one you use it makes a BIG impact on the feel of your room. My apartment is painted in the color “Bone” from McCormick. Don’t get me wrong there’s nothing wrong with the actual paint or color. The problem is this: my apartment is a very sunny place with tons of windows that face South, East, and West add in the deep tan floors and my room reads very warm colorwise. The Bone paint has yellow undertones which make the white shade read warmer. Add all those factors together and the walls in my apartment just look…yellow.
I was ASSURED by management it was white and it technically is but it’s a white with strong yellow undertones. While the other apartments in the complex that face North or the ones that only have a few windows might appreciate the warmer toned white, I did not. So the first thing I knew for sure that I wanted to do in this apartment is paint *e v e r y t h i n g* a nice crisp white. I’m talking ice cold pinot grigio on the hottest August day crisp.

The accent wall. I as so excited when I viewed the apartment, this photo was hopelessly lopsided.

So many shades of black
Now some of you who've been following this ORC project (journey? fever dream? whatever you want to call it.) on my Instagram might be confused. Because you definitely saw me paint my walls a sharp black, the exact opposite of a crisp white. You might be confused as to how we got here and, if I’m honest with you, so am I.
My design style skews light and airy. Although, I like color and am by no means a minimalist I always liked the breeziness of an all-white colored home. I especially like to use white to help rooms feel bigger. But this apartment has a semi-open concept meaning you can see into every room from another room because none of the main spaces have doors. So while my use of white would make the room look big it would also make it look flat.
There is one long wall that divides my kitchen and dining room from my living room. It has an archway that looks into the dining room and a passthrough into the kitchen. I thought painting this wall an accent color would help to give the space more dimension. But which color to pick? I was hesitant to add yet another color to the space given how vibrant and colorful the space already was. I also didn’t want the wall to be the main focal point. I wanted people to notice it but I didn’t want it to overwhelm the space. I’d been toying with using the color black in other spaces. It’s such a bold color and I was intrigued by it. At first, I was going to paint my hallway or my bathroom in black, a smaller space that wouldn’t distract from my bright and airy look. But as time went on it made sense to paint the accent wall in black. Black, although bold, is still a neutral color and because this particular wall faces a bank of windows, the room wouldn’t feel closed in.
Or so I hoped.
I crossed my fingers and made the plunge with Clare’s Blackest. Halfway through the first coat, I was terrified I had made a grave mistake. But as my friend who was helping me said “it’s just paint, you can always change it”. So we soldiered on. By the time the first coat was down, so was the sun and the wall looked better but I wasn’t exactly convinced I had made the right decision. I went to bed and woke up the next day to the morning hitting the now pitch black wall and just died. It was so perfect! I did a second coat of black just to even out our brush strokes but the color was already rich and velvety looking just like I wanted. Then I started adding in the gallery wall frames and a chair I’d purchased. The contrast of the white and black just SANG. This was even better than I had imagined.

An artist’s workshop

All my other walls were painted in the color “Fresh Kicks”

Staging the gallery wall
Because the painting took so much out of me this week, I only did a smaller DIY project in my mornings and evenings before and after work. I found these lamps on Facebook Market Place for $20 for the pair. It seemed like a steal until I found out they didn’t work. But this was an opportunity for me to learn something new: rewiring a lamp. I found this great video showing me exactly how to do it and I already had the electrical pliers from when I needed to remove my wall sconces to fit my faux built-ins.
Following the directions in the video, I was able to rewire my first lamp correctly on the first try! It was SO easy! Now for the fun part: making it pretty. I struggled with the idea of painting over these lamps because I thought the powder blue was so pretty even if it didn’t quite mesh with my space but again, go big or go home.
I decided to create a ceramic-like texture to mimic the ones I’d seen at Anthropologie and Pottery Barn. To achieve this look, I used the same technique that I used to personalize my Studio McGee x Target vase.
Lamp Directions
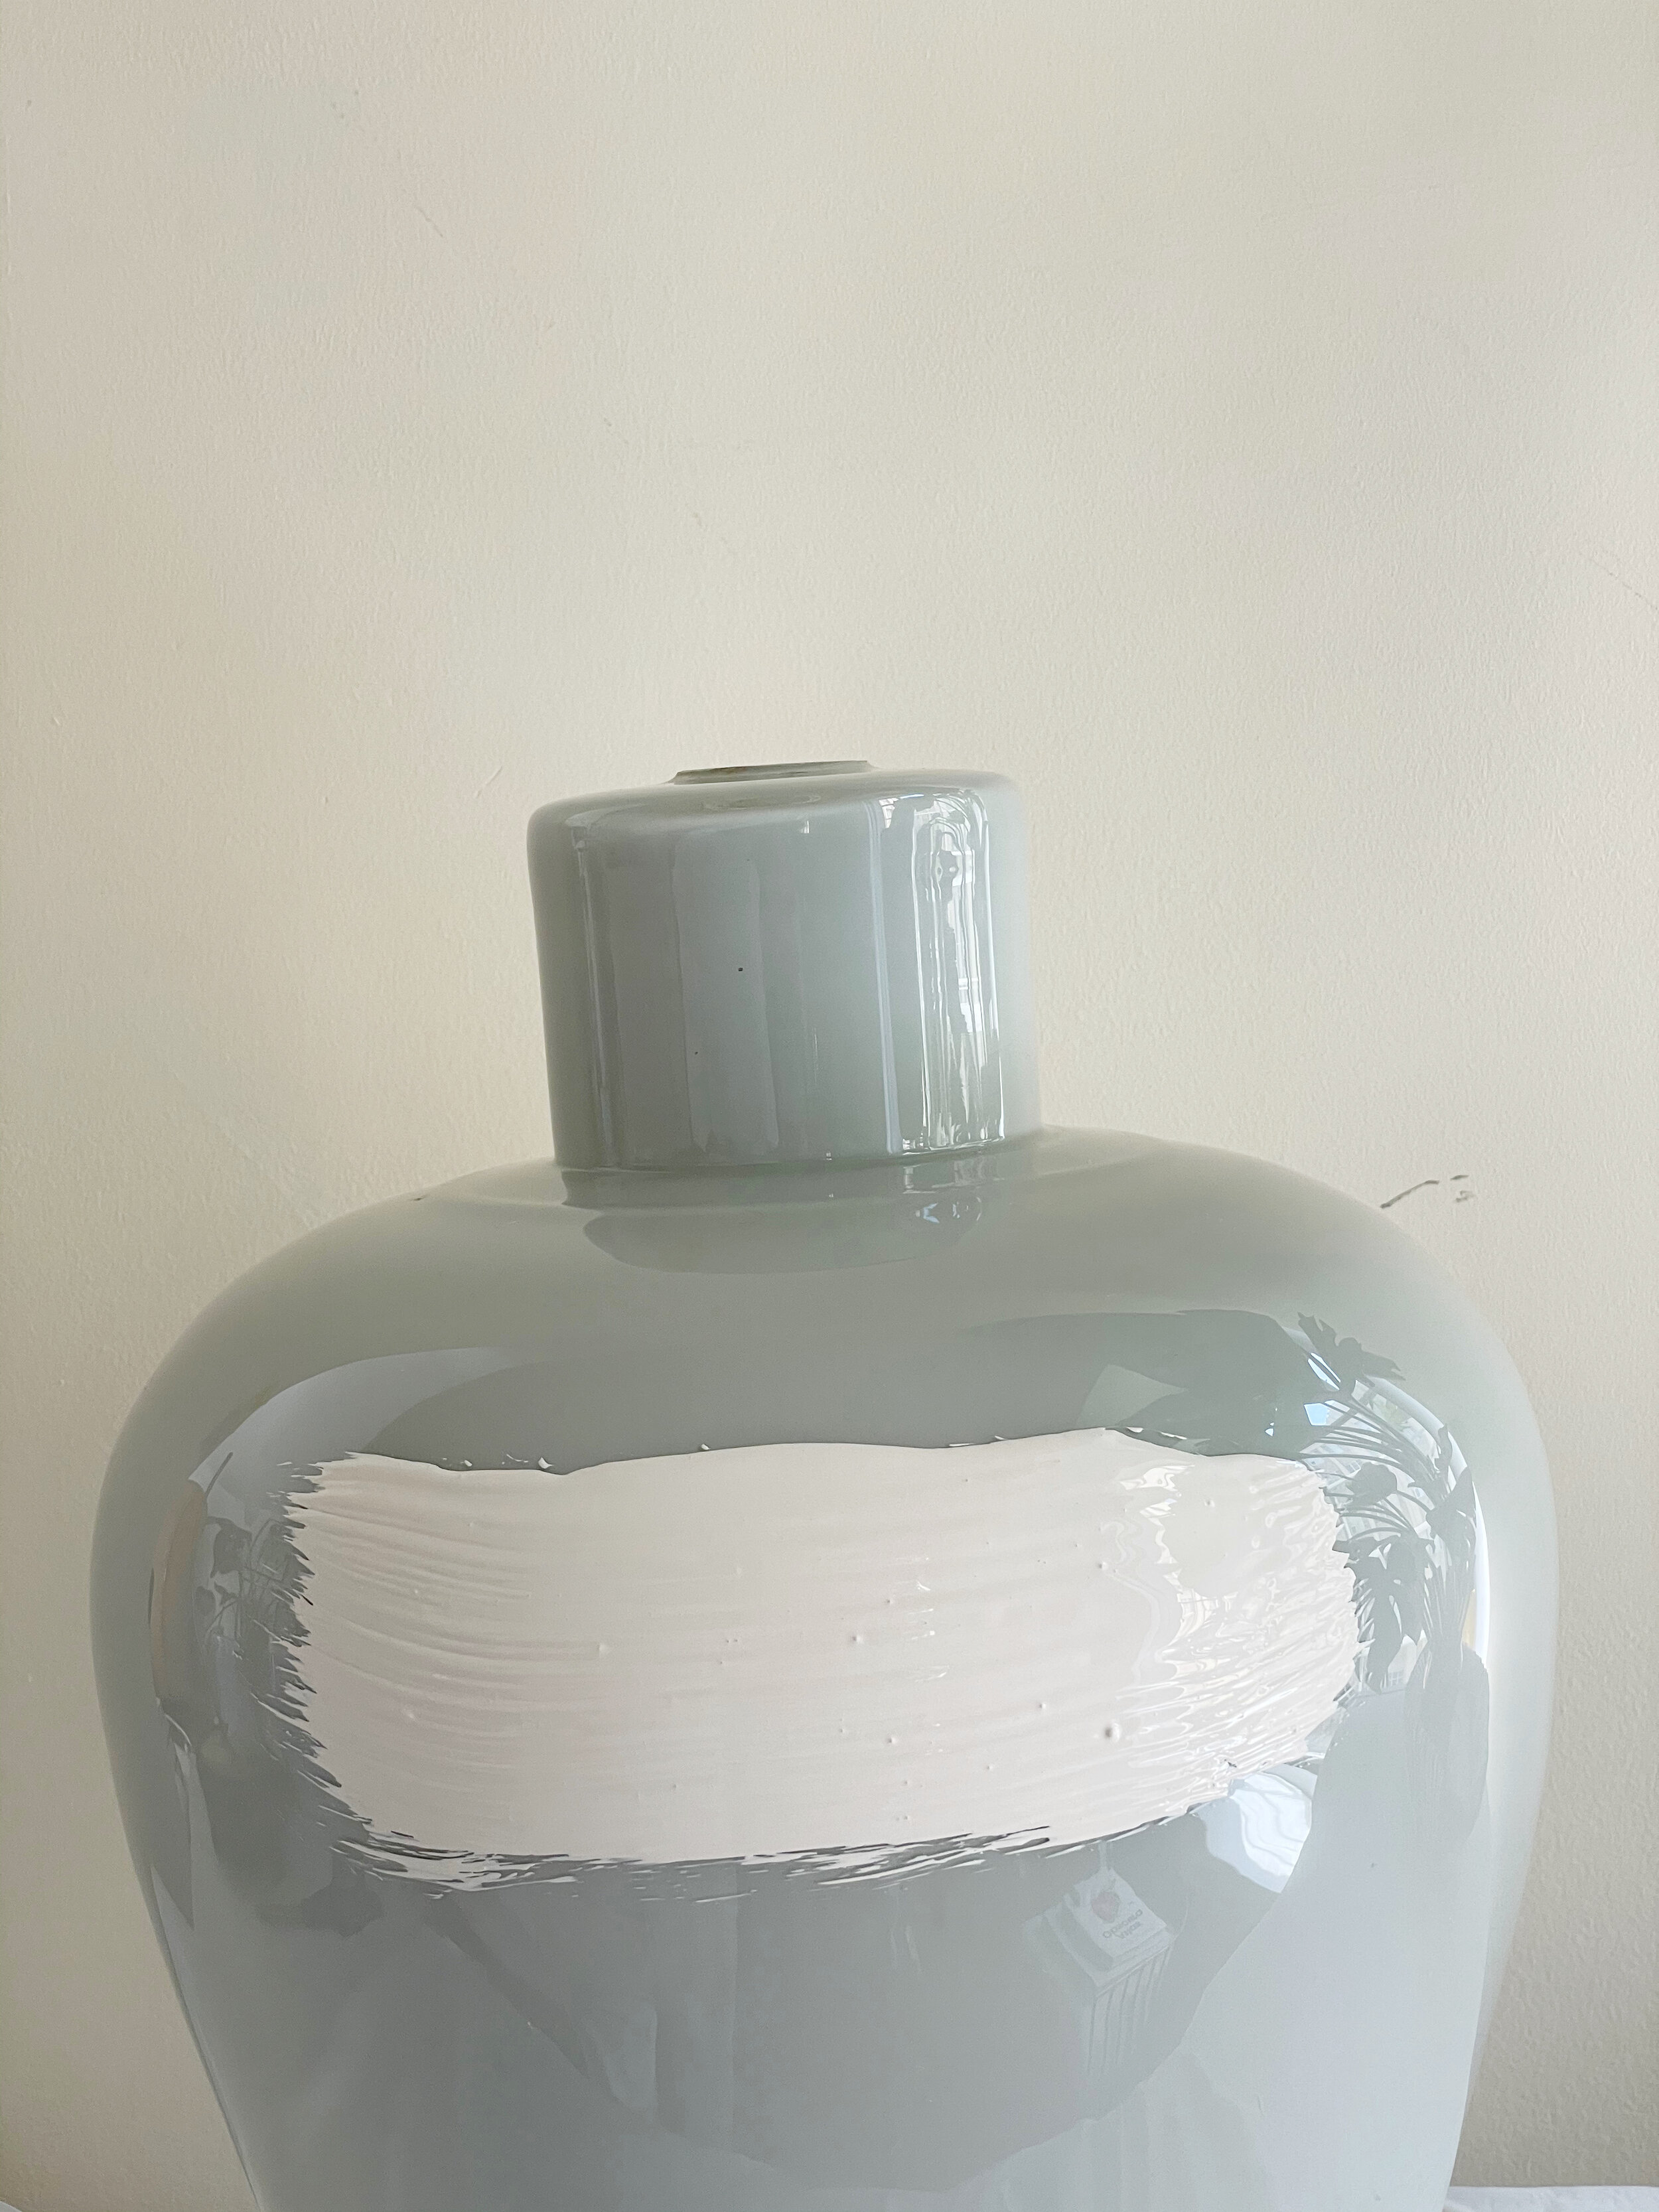
Mix the paints Fresh Kicks and Linen. I used the linen color to add a warm tone that would make it look more like ceramic. I only added a few quirts of the linen color.
Paint the lamp. You only need one coat here. Just to cover the existing color. I painted in a horizontal circular motion following the shape of the lamp. Almost as if the lamp itself were on a pottery wheel.
Mix another batch of paint. This time add in some baking soda. There isn’t an exact formula, add more baking soda if you want a more textured look, less for a smoother look. I used less than 1/4 of a cup for each lamp. I wanted the paint to be textured enough that it would leave behind a ridged pattern to mimic the shape you get from a pottery wheel but still smooth overall.
OPTIONAL: Once you are done mixing the baking soda into the paint add an extra dab of linen paint and only mix it in slightly. this will give the lamp a slightly irregular color in some spots to make it look more like handmade pottery.
Using your brush, repeat the same horizontal circular motion ( I even put mine on my plant stand at one point and just dragged my brush while walking around it in a circle)
Once the lamp is fully covered and you’re satisfied with the stroke pattern, set it aside and let it dry overnight.
OPTIONAL: If you need to rewire your lamp, now is the time to do it. Again, follow the steps from the video. I promise you it’s a lot easier than it looks.
OPTIONAL: Try out different lamp shades. I ultimately chose this one although I really didn’t want to because it was the most expensive of the 5. Yes, I paid more for the shade than I did the lamp. No, I will not be taking any questions at this time.
OPTIONAL: Because I was putting these in my new faux built-ins. I cut a small hole in the back of each bookcase to put the wires through. I also decided to be extra and wire them into an Alexa Smart plug so that I could turn them on without getting up during a Great British Bake Off binge.

Deconstruct your lamp (if you are rewiring it). Skip this step if you are not rewiring

Let dry. The paint will look slightly darker when dried because of the addition of the Linen colored paint.
First coat of paint without baking soda

Lamp kit for rewiring.

Mix in baking soda

Wire cutter, screw driver and directions for rewiring.
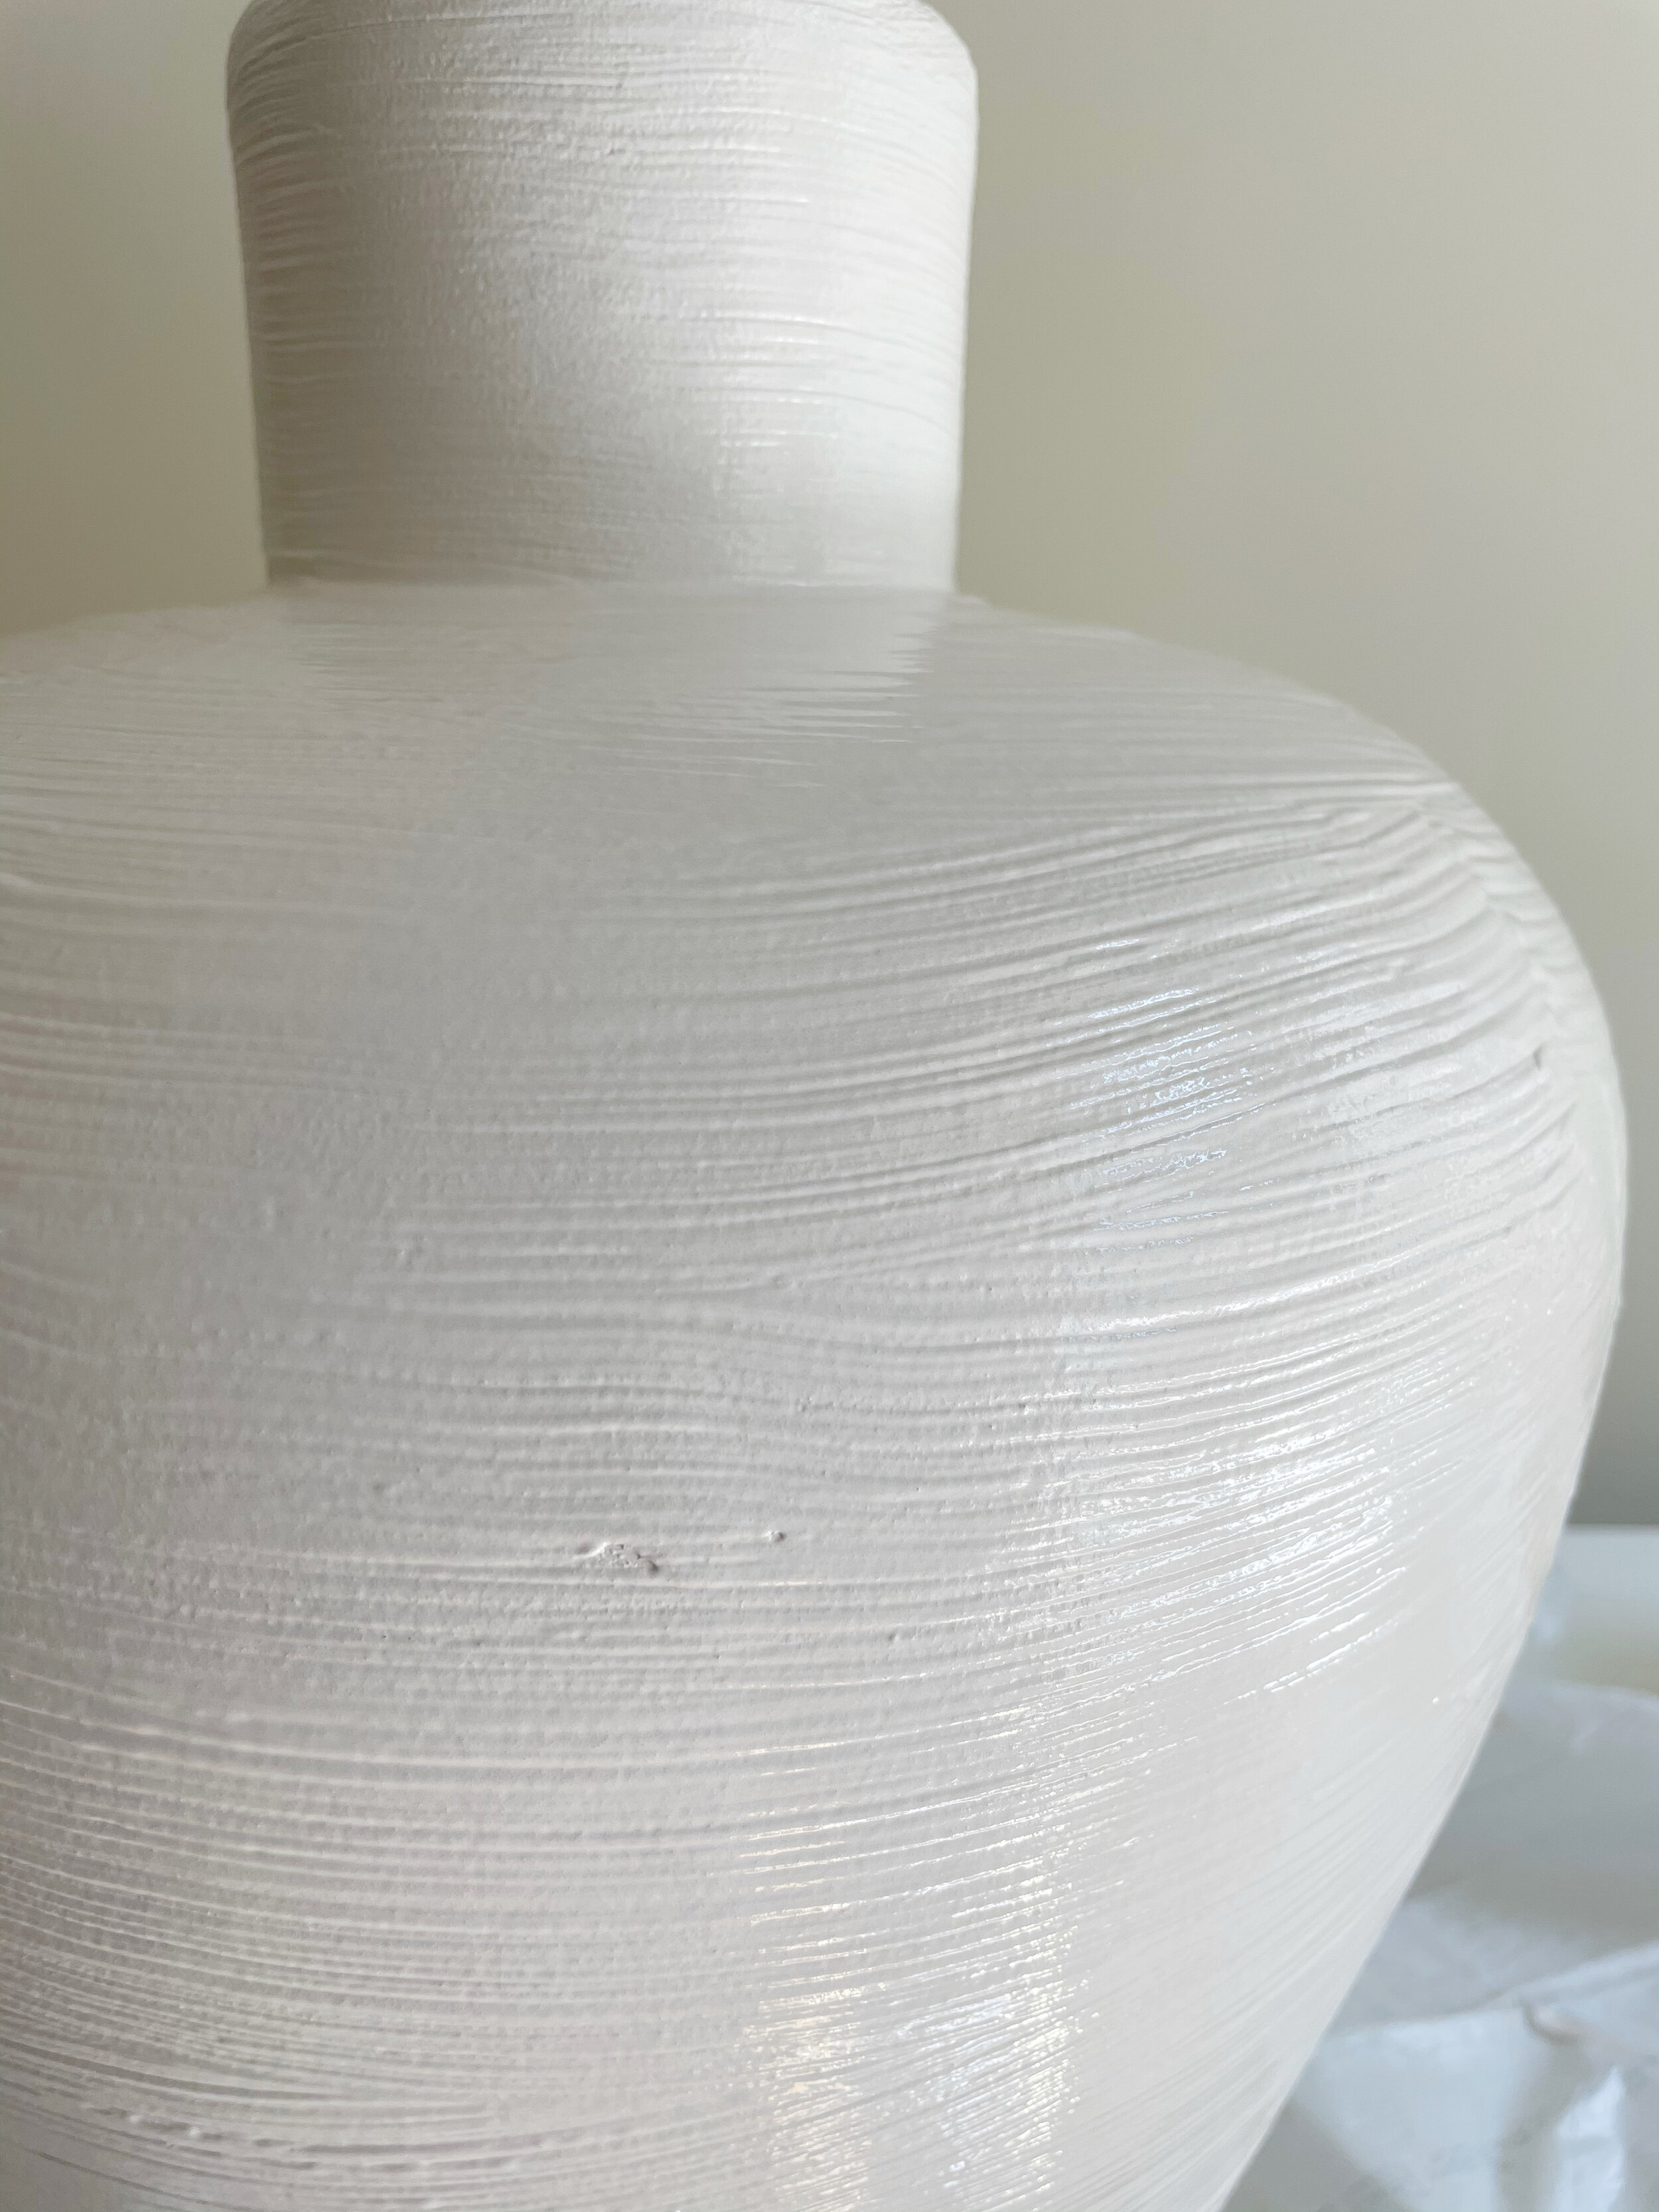
Second coat with baking soda. see how the baking soda and the stroke of the brush helps to create a pottery like finish?

The final product!
And with that, we are halfway through the One Room Challenge!! Let’s take a look at my to-do list, shall we?
To Do List
1. Build Faux Built In Bookcase
2. Create a cover for the TV
3. Fluted Bar Cabinet Makeover
4. Rewire and Revamp Table Lamps
5. Install Picture Light
6. Paint Room
7. Photo Gallery Wall
8. Hang Curtains
9. Create Custom Wall Art
10. Relocate and Paint Fireplace Surround
Not too bad! Next week I’ll tackle my fireplace rental-vation. stay tuned!
Resources
Wall Paint
Whipped Trim by Clare
Fresh Kicks by Clare
Blackest by Clare
(Get $10 off your first $150+ paint order from Clare using my link!)
Lamp DIY
Fresh Kicks by Clare
Linen by FolkArt
Brush
Baking Soda

This post contains affiliate links. If you make a purchase through one of my links, I may receive a small commission at no cost to you.