ORC Spring ‘21 Week Five: Faux Fireplace and DIY Custom Curtains
You can read all my posts about this One Room Challenge project here: Week 1 | Week 2 | Week 3 | Week 4 | Week 5 | Week 6 | Week 7 | Week 8. You can also watch the whole ORC process on my Instagram highlight. Don’t forget to check out the reveals of the 20 Featured Designers and the rest of the Guest Participants!
Remember the hit show YOU? The one that promised me a season three this year and six months in has not delivered? That show. So during season 1 [spoiler alert] the main character, Beck, is a single woman living in a first-floor apartment in NYC that faces a front street. Nothing wrong with that if you don’t like sleeping. No, my problem with this is that despite the location of her apartment she doesn’t have any curtains. Not so much as a single sheet of tissue paper to hide her from prying eyes which is unfortunate given that she eventually gets a stalker. Throughout the season the only thing that I could think of is “wow this girl really doesn’t have any curtains…like not even some bedsheets nailed to the wall. That’s…a choice”. Do I think curtains would have saved her? No, but it would have made the stalking a little harder.
Now, what did I learn from that season? Not a damn thing apparently because I’m 9 months into this lease and finally just put up curtains this week despite the fact that this apartment has more windows than walls.
Listen curtains are a tedious task. So much measuring, you have to hem them if they are too long, making sure your rods are straight and on top of that they can be SO expensive. So much work for such a simple part of your home. And yet, as simple they are they make SUCH a huge difference in a room. At this point, a huge part of my ORC project is done, and even then the room just looked incomplete. it needed curtains to tie it all together.
My favorite curtains are the RITVA curtains from IKEA. They are simple and work with so many different styles. They are semi-sheer and made of cotton so they are thick enough for blocking out the harshest of the sun’s rays but still sheer enough to let in filtered light which is great if you have plants. At $20, $30, and $40 for the 65 inches, 98 inches and, 108 inch long curtains respectively they are very affordable as curtains go.
Now if you read my post about building my faux built-ins you’ll recall that IKEA’s supply chain is taking quite the hit. So although, the 65 inch long curtains would have been perfect for my windows they were nowhere to be found. I eventually found a set of the longer pair on Jeff Bezo’s hellscape of a site at a significant upcharge but people on ORC timelines can’t be choosy. Even though I had the curtains, I still needed to hem them.
Now do I know how to sew? Actually, I do but I would rather not. Who has the time? Enter hemming tape, a lovely invention that will shorten the hems of your curtains, no needles involved. Here’s how:
Hemming the Curtains
Lay one panel out on a flat surface. I laid it out on my floor on top of a throw blanket
Using a measuring tape, I calculated how much I would need to shorten the panel.
At the point where the curtain needs to be shortened, place a strip of hemming tape along the entire width of the panel
Fold the remaining length of the panel to be shortened in half until it covers the hemming tape
Fire up your steamer or iron. You are technically supposed to use an iron but I don’t own an iron and only use a garment steamer for my clothes. You can also iron your curtains at this time if you’d like but I have found that the weight of the curtains eventually takes out all the wrinkles.
Once your heating tool of choice is heated up, place the warm part over top of the panel piece that’s covering the hemming tape
Go back and forth slowly until the tape is melted.
Let the panel cool down and gently tug on the panel to ensure that the pieces are connected.
Place another strip of hemming tape on top of the panel you’ve just sealed
Fold the remaining portions of the panel to be hemmed in half and repeat steps 6-8
Once all your panels are hemmed, it’s time to pleat your curtains I followed the directions from White Lane Decor for this step.
After you pleat the curtains, attach the curtain rings
Hang your newly hemmed and pleated curtains on the curtain rods using the curtain rings.

I used one package per side of the window. Two packs total per window
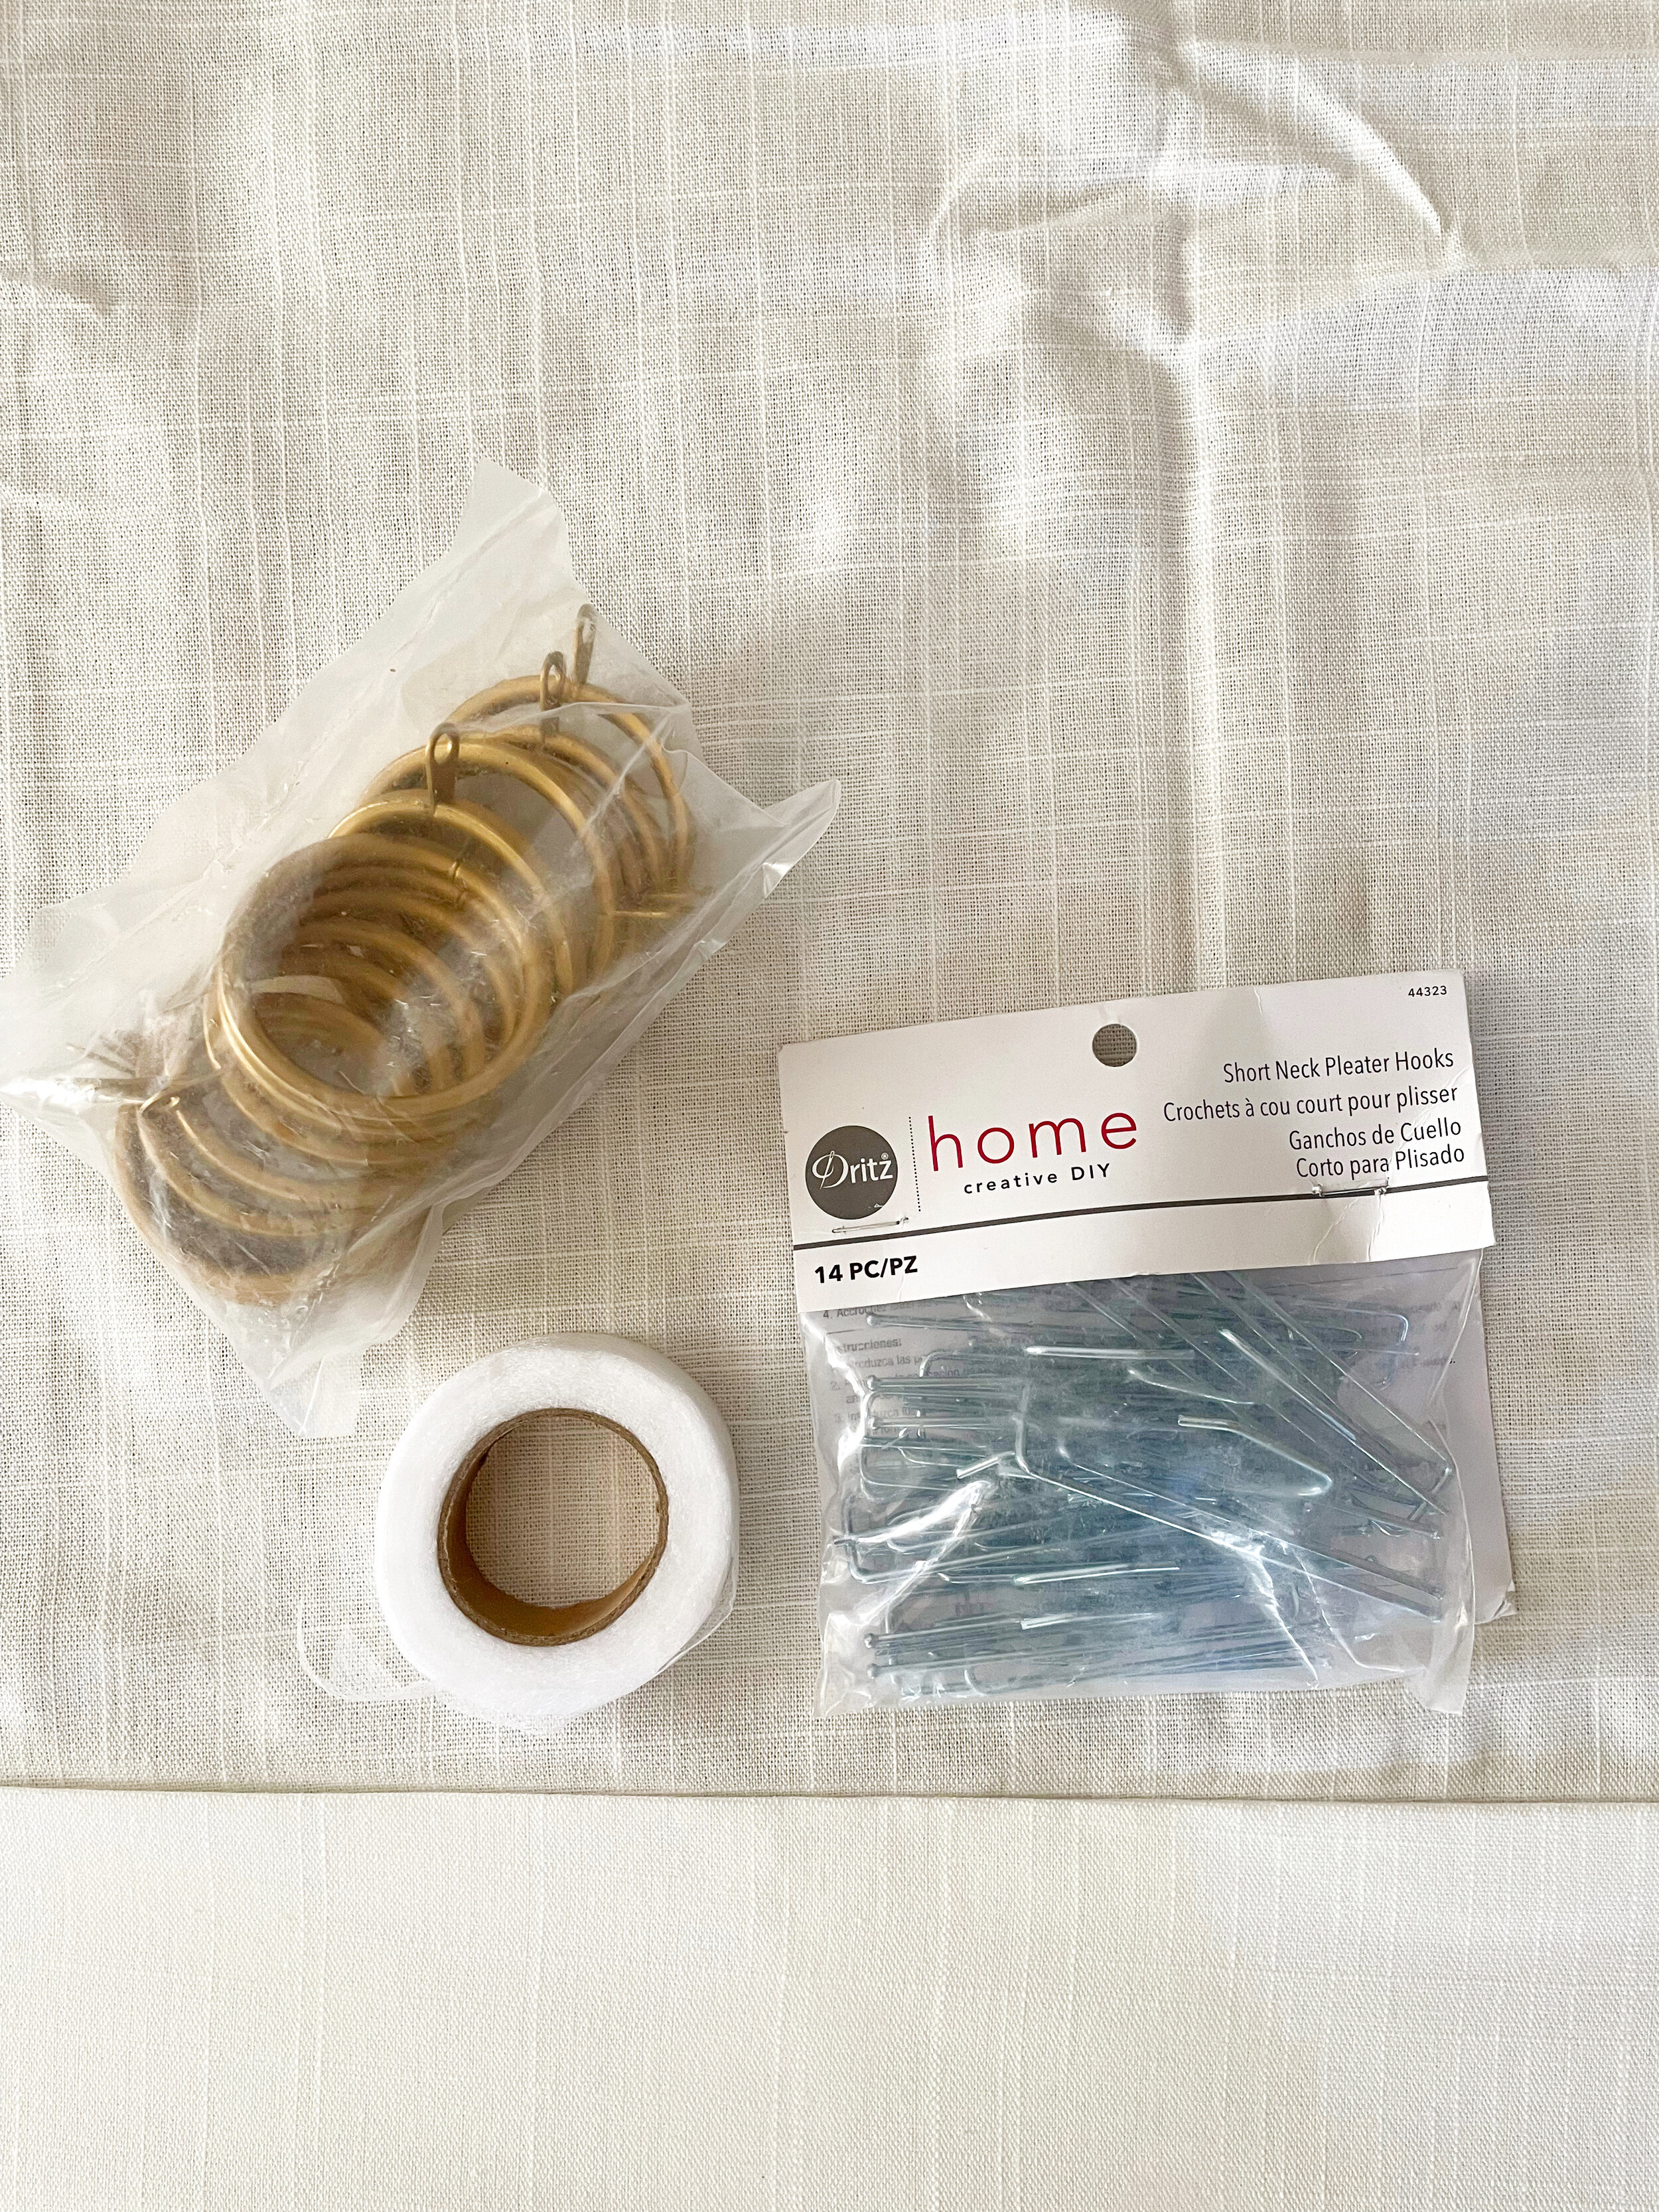
Curtain rings, hemming tape, pleater hooks

Sealing the hemming tape. I used a steamer because I don’t have an iron. It worked fine!

Creating the pleats using the pleater hooks

Curtain rings to hook to the pleater hooks

The curtains before and after I hemmed them
Now that my curtains are up the next step is to refurbish my fireplace mantle. I purchased this mantel for $50 on Craigslist from a lovely couple that was renovating their home. After cramming my mantle into an UberXL (city life, amiright?) it was ie to figure out how to actually use the mantle. I originally attached it to my wall using an anti-tip kit. While this did work to keep the mantle up, it wasn’t fully flush to the wall which is what I wanted. Since I was relocating this mantle to accommodate my faux built-ins, I thought I would use this as a chance to attach it more securely to the wall, repaint it and give it a it of a makeover to destract from the fact that its not a working fireplace. Here’s how I did it:
Fireplace Makeover
I mounted the mantle to the wall using a french cleat. I attached one piece to my wall and the other to my mantle and connected the two. the cleat is weighted to hold up to 300 pounds. While the mantle is heavy its nowhere near 300lbs.. Since I only planned on putting small. items n the fireplace, I wans’t worried about putting additional weight on
Next, I hung the mirror above the fireplace also using a french cleat that came with it. while it looks like the mirror is resting on the mantle it is not. That mirror has to weigh at least 75lbs and I did not want to test my luck with the mantle cleat. So with a lot of precise measuring, I hung the mirror so it was as close to the mantle as possible without resting on it.
After the mirror and mantle were hung, I repainted the entire mantle using chalked paint in two coats
After letting it dry, it was time to add the wallpaper
Using double-sided sticky tape I attached the wallpaper to a piece of cardboard and then sid the cardboard into the space behind the mantle
After the wallpaper was on, it was time to lay down the tiles. Given that I can’t actually put a title down, I laid down more carpet to fit the area of the titles and placed the tiles directly on the cardboard. This protects the tiles from scratching my floors
While I did not secure the tiles at all because I am not entirely sure this is the final look I am going for, If I did secure them I would have used super glue or some kind of strong adhesive to secure the cardboard to the tiles.
Styling! You can watch me style the fireplace here

Waiting for my uber….
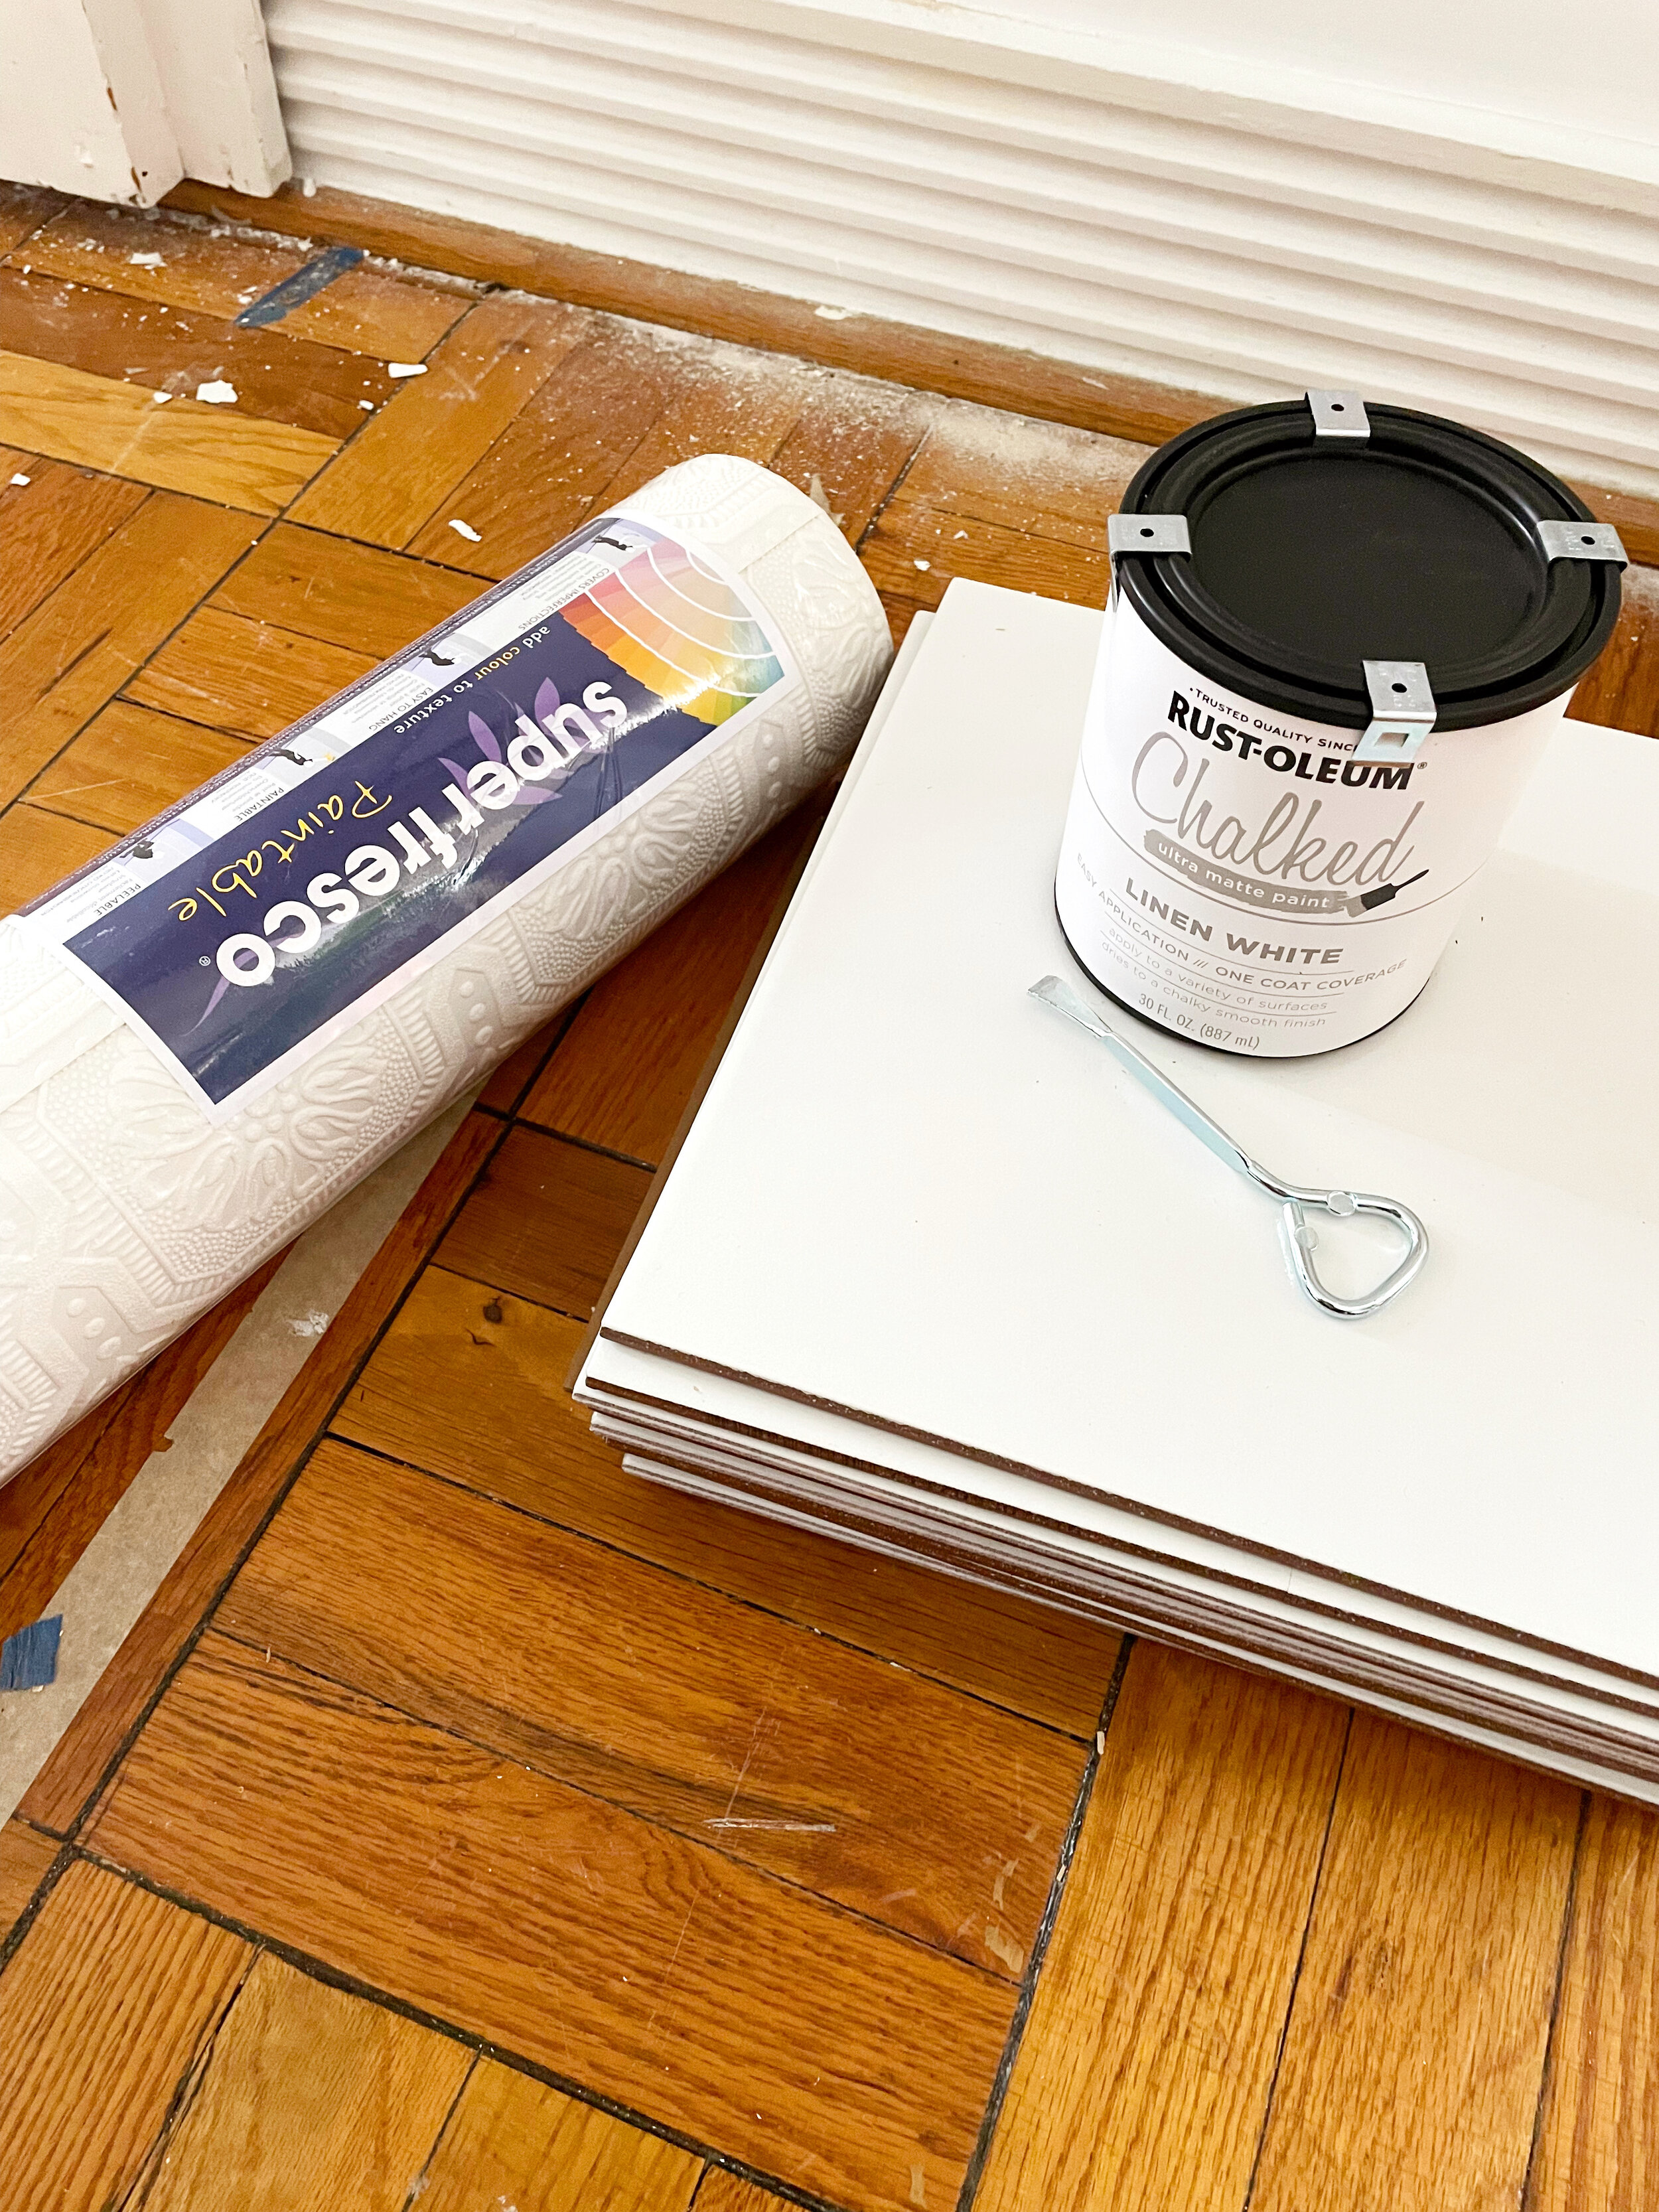
My supplies for the mantle makeover

Where I’ll place the fireplace
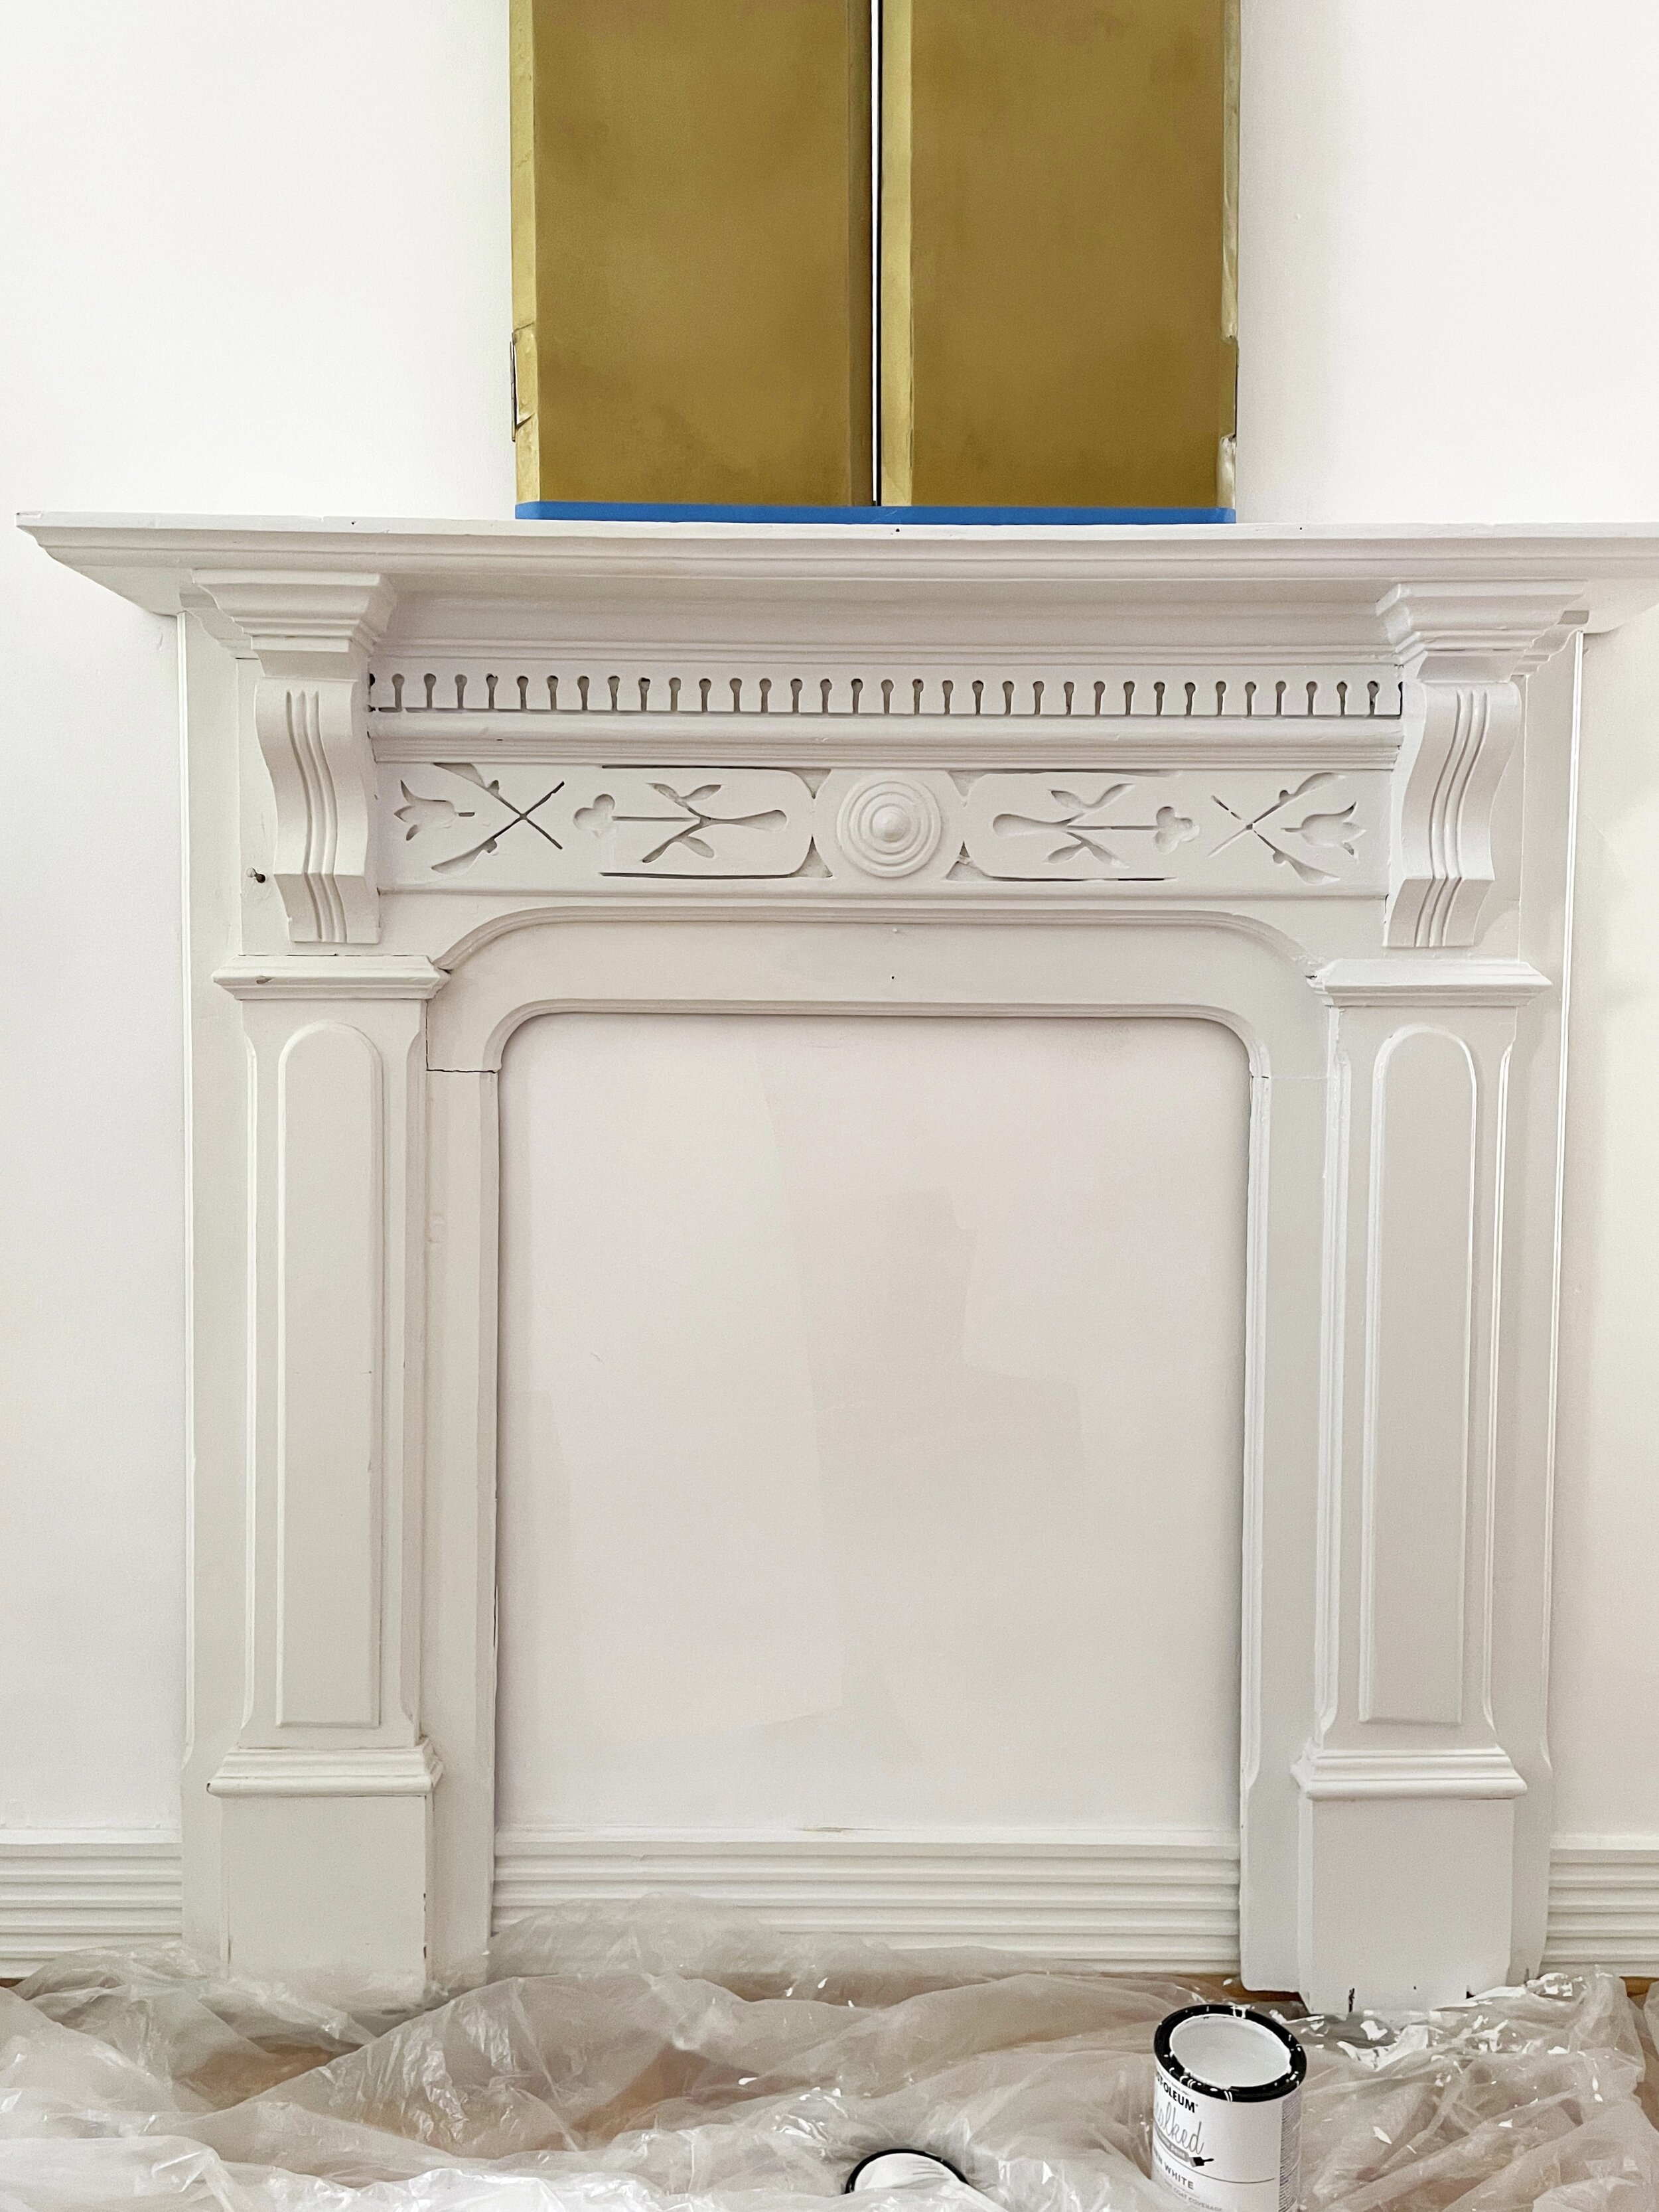
Partially painted mantle

Adding the wallpaper using double scotch tape
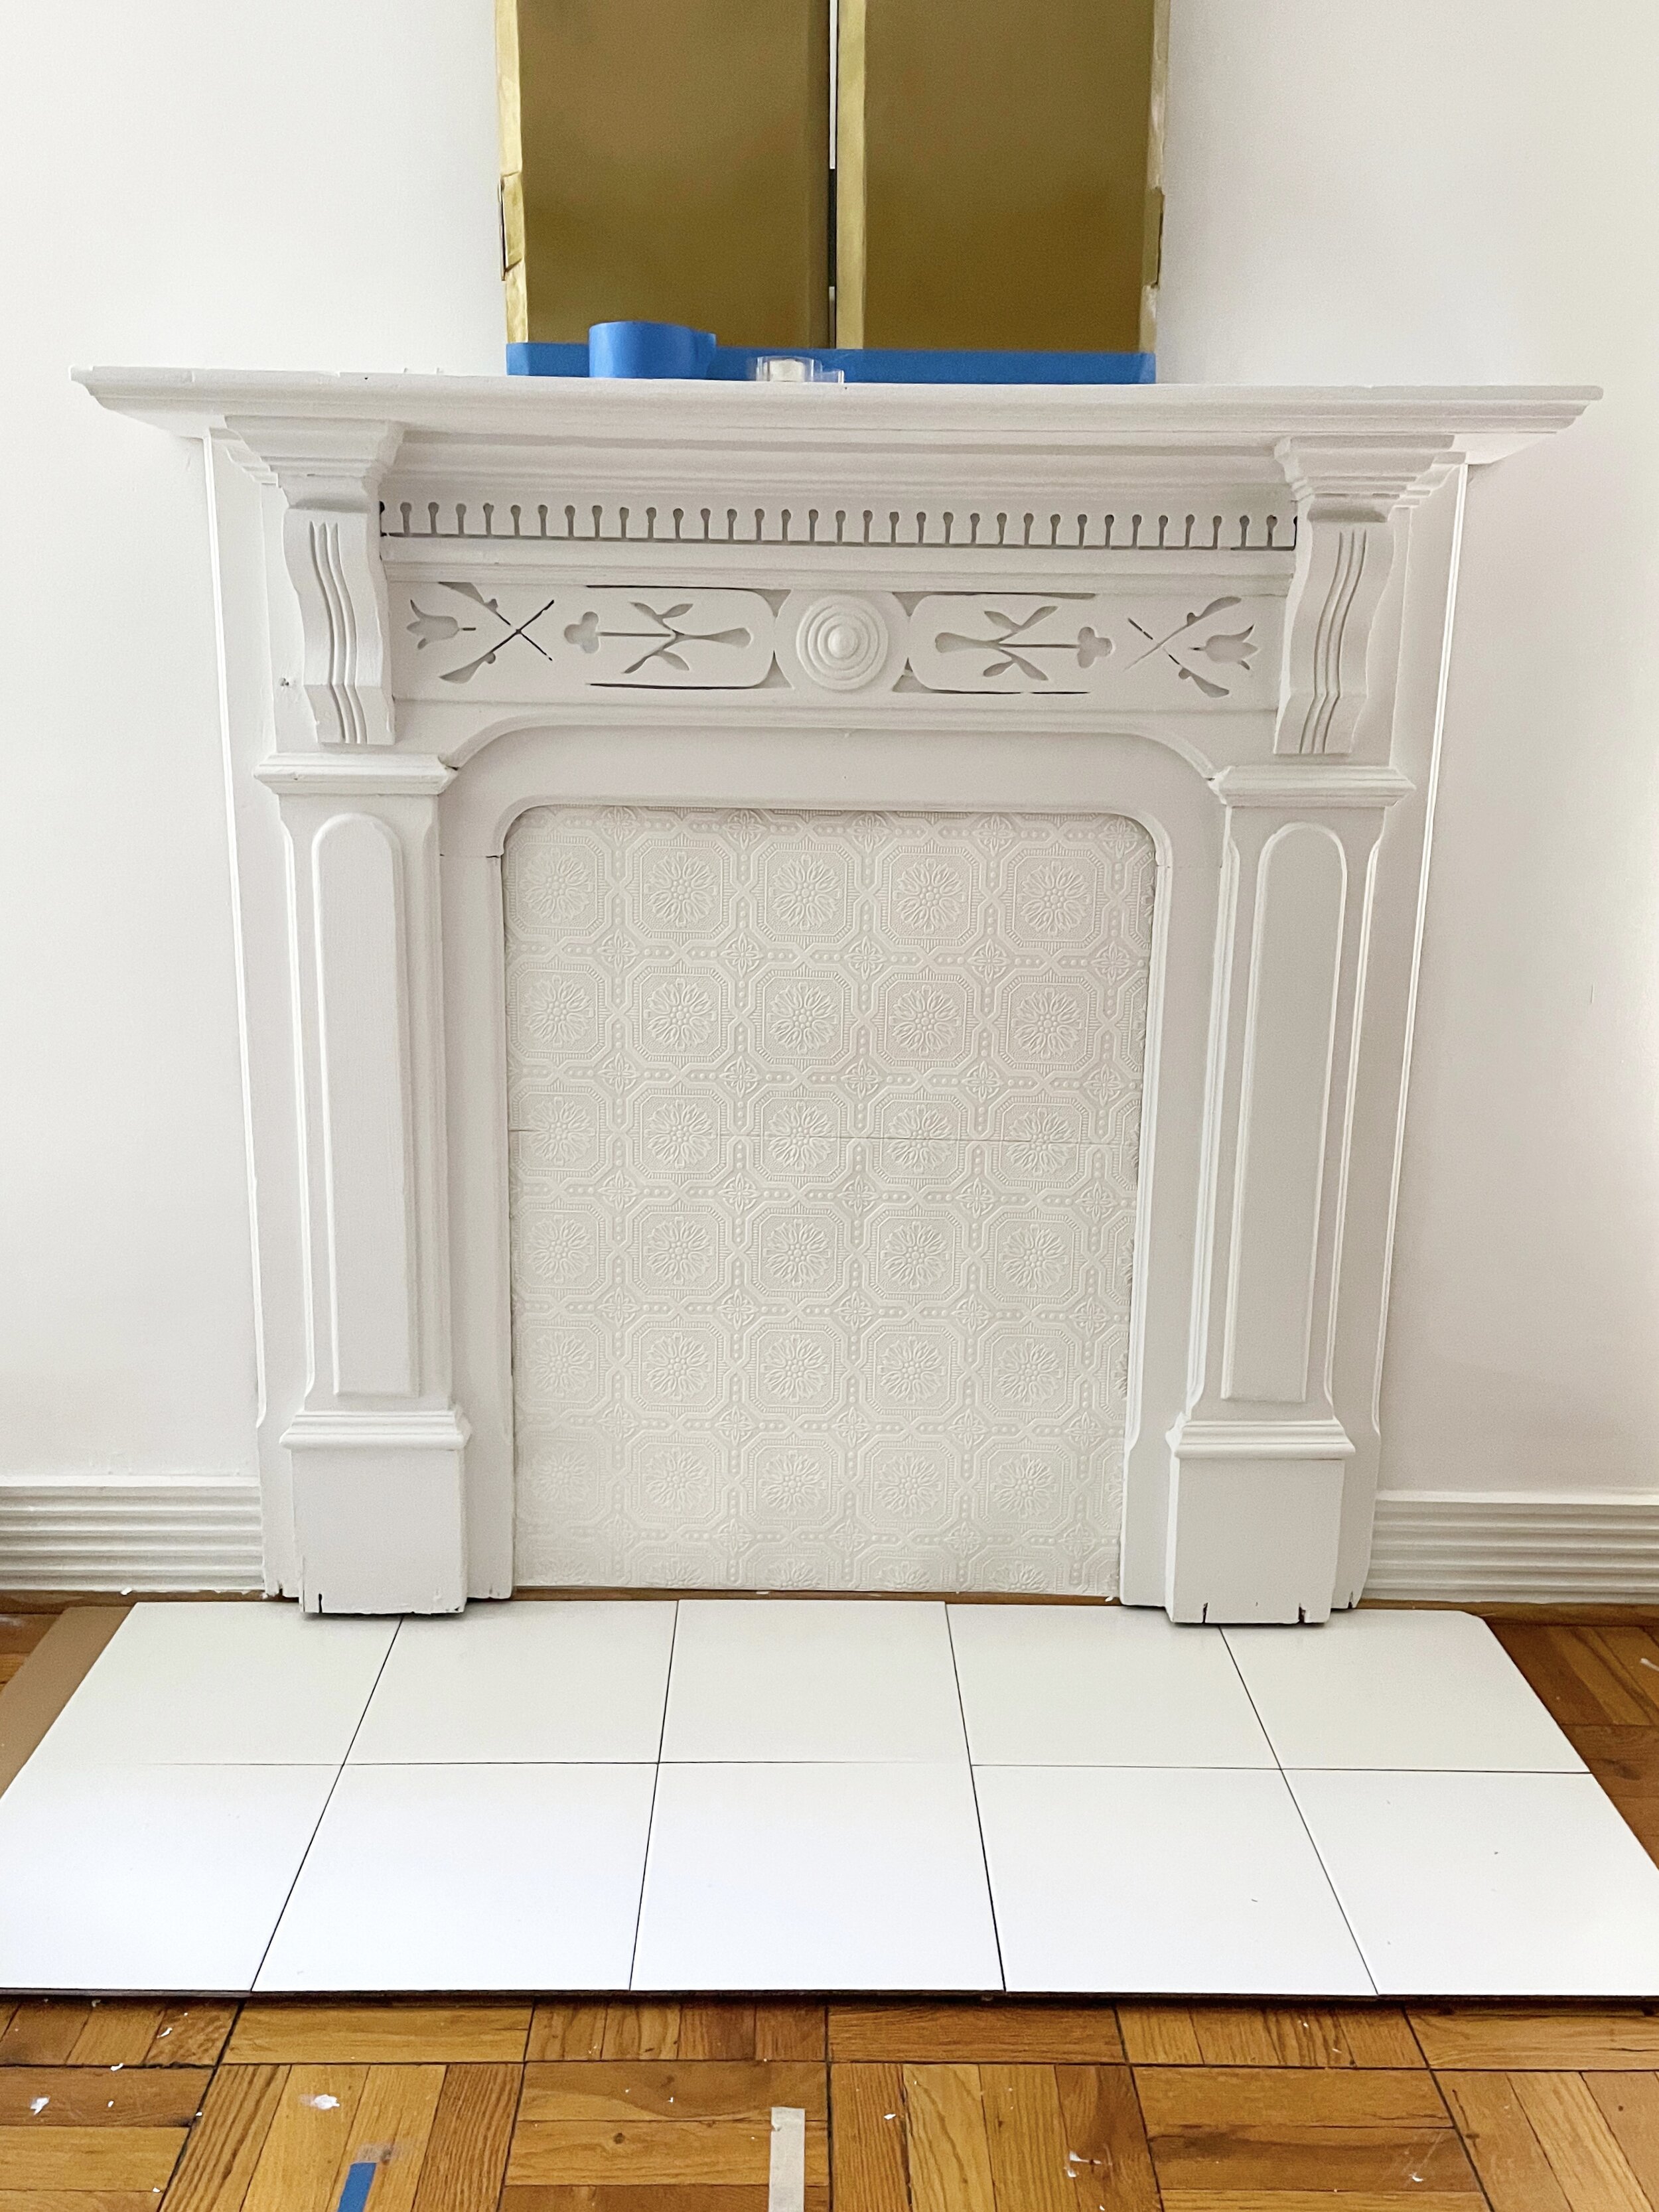
Placing the tile
With Week of the ORC done let’s take a look at the to-do list shall we?
To Do List
1. Build Faux Built In Bookcase
2. Create a cover for the TV
3. Fluted Bar Cabinet Makeover
4. Rewire and Revamp Table Lamps
5. Install Picture Light
6. Paint Room
7. Hang Curtains
8. Relocate and Paint Fireplace Surround
8. Photo Gallery Wall
9. Create Custom Wall Art
Resources
Fireplace Mantle
French Cleat (300 LB limit)
Copper Plate - Antique from Turkey
Window Treatments

This post contains affiliate links. If you make a purchase through one of my links, I may receive a small commission at no cost to you.