ORC Spring ‘21 Week Six: DIY Large Scale Art
You can read all my posts about this One Room Challenge project here: Week 1 | Week 2 | Week 3 | Week 4 | Week 5 | Week 6 | Week 7 | Week 8. You can also watch the whole ORC process on my Instagram highlight. Don’t forget to check out the reveals of the 20 Featured Designers and the rest of the Guest Participants!
You know when you become an adult and you realize how expensive things are? Especially things you didn’t expect to be expensive. Like curtains, rugs, and throw pillows. Freaking throw pillows. Why come so pricey? Another thing that’s unexpectedly pricey: Art. Art can be SO expensive. Especially if you want something that doesn’t scream “mass-produced”. I like to use places like Etsy to find art that is more unique and often very affordable. But something I have not been able to find an affordable place for nice large-scale art. Which meant I had to create it, until now.
Today, I’ll share how I made two large-scale pieces of art for my ORC! I’m going to show you how to upcycle your current art and show you how to duplicate a piece of high-end art. Let’s go!
Diy Textured Art
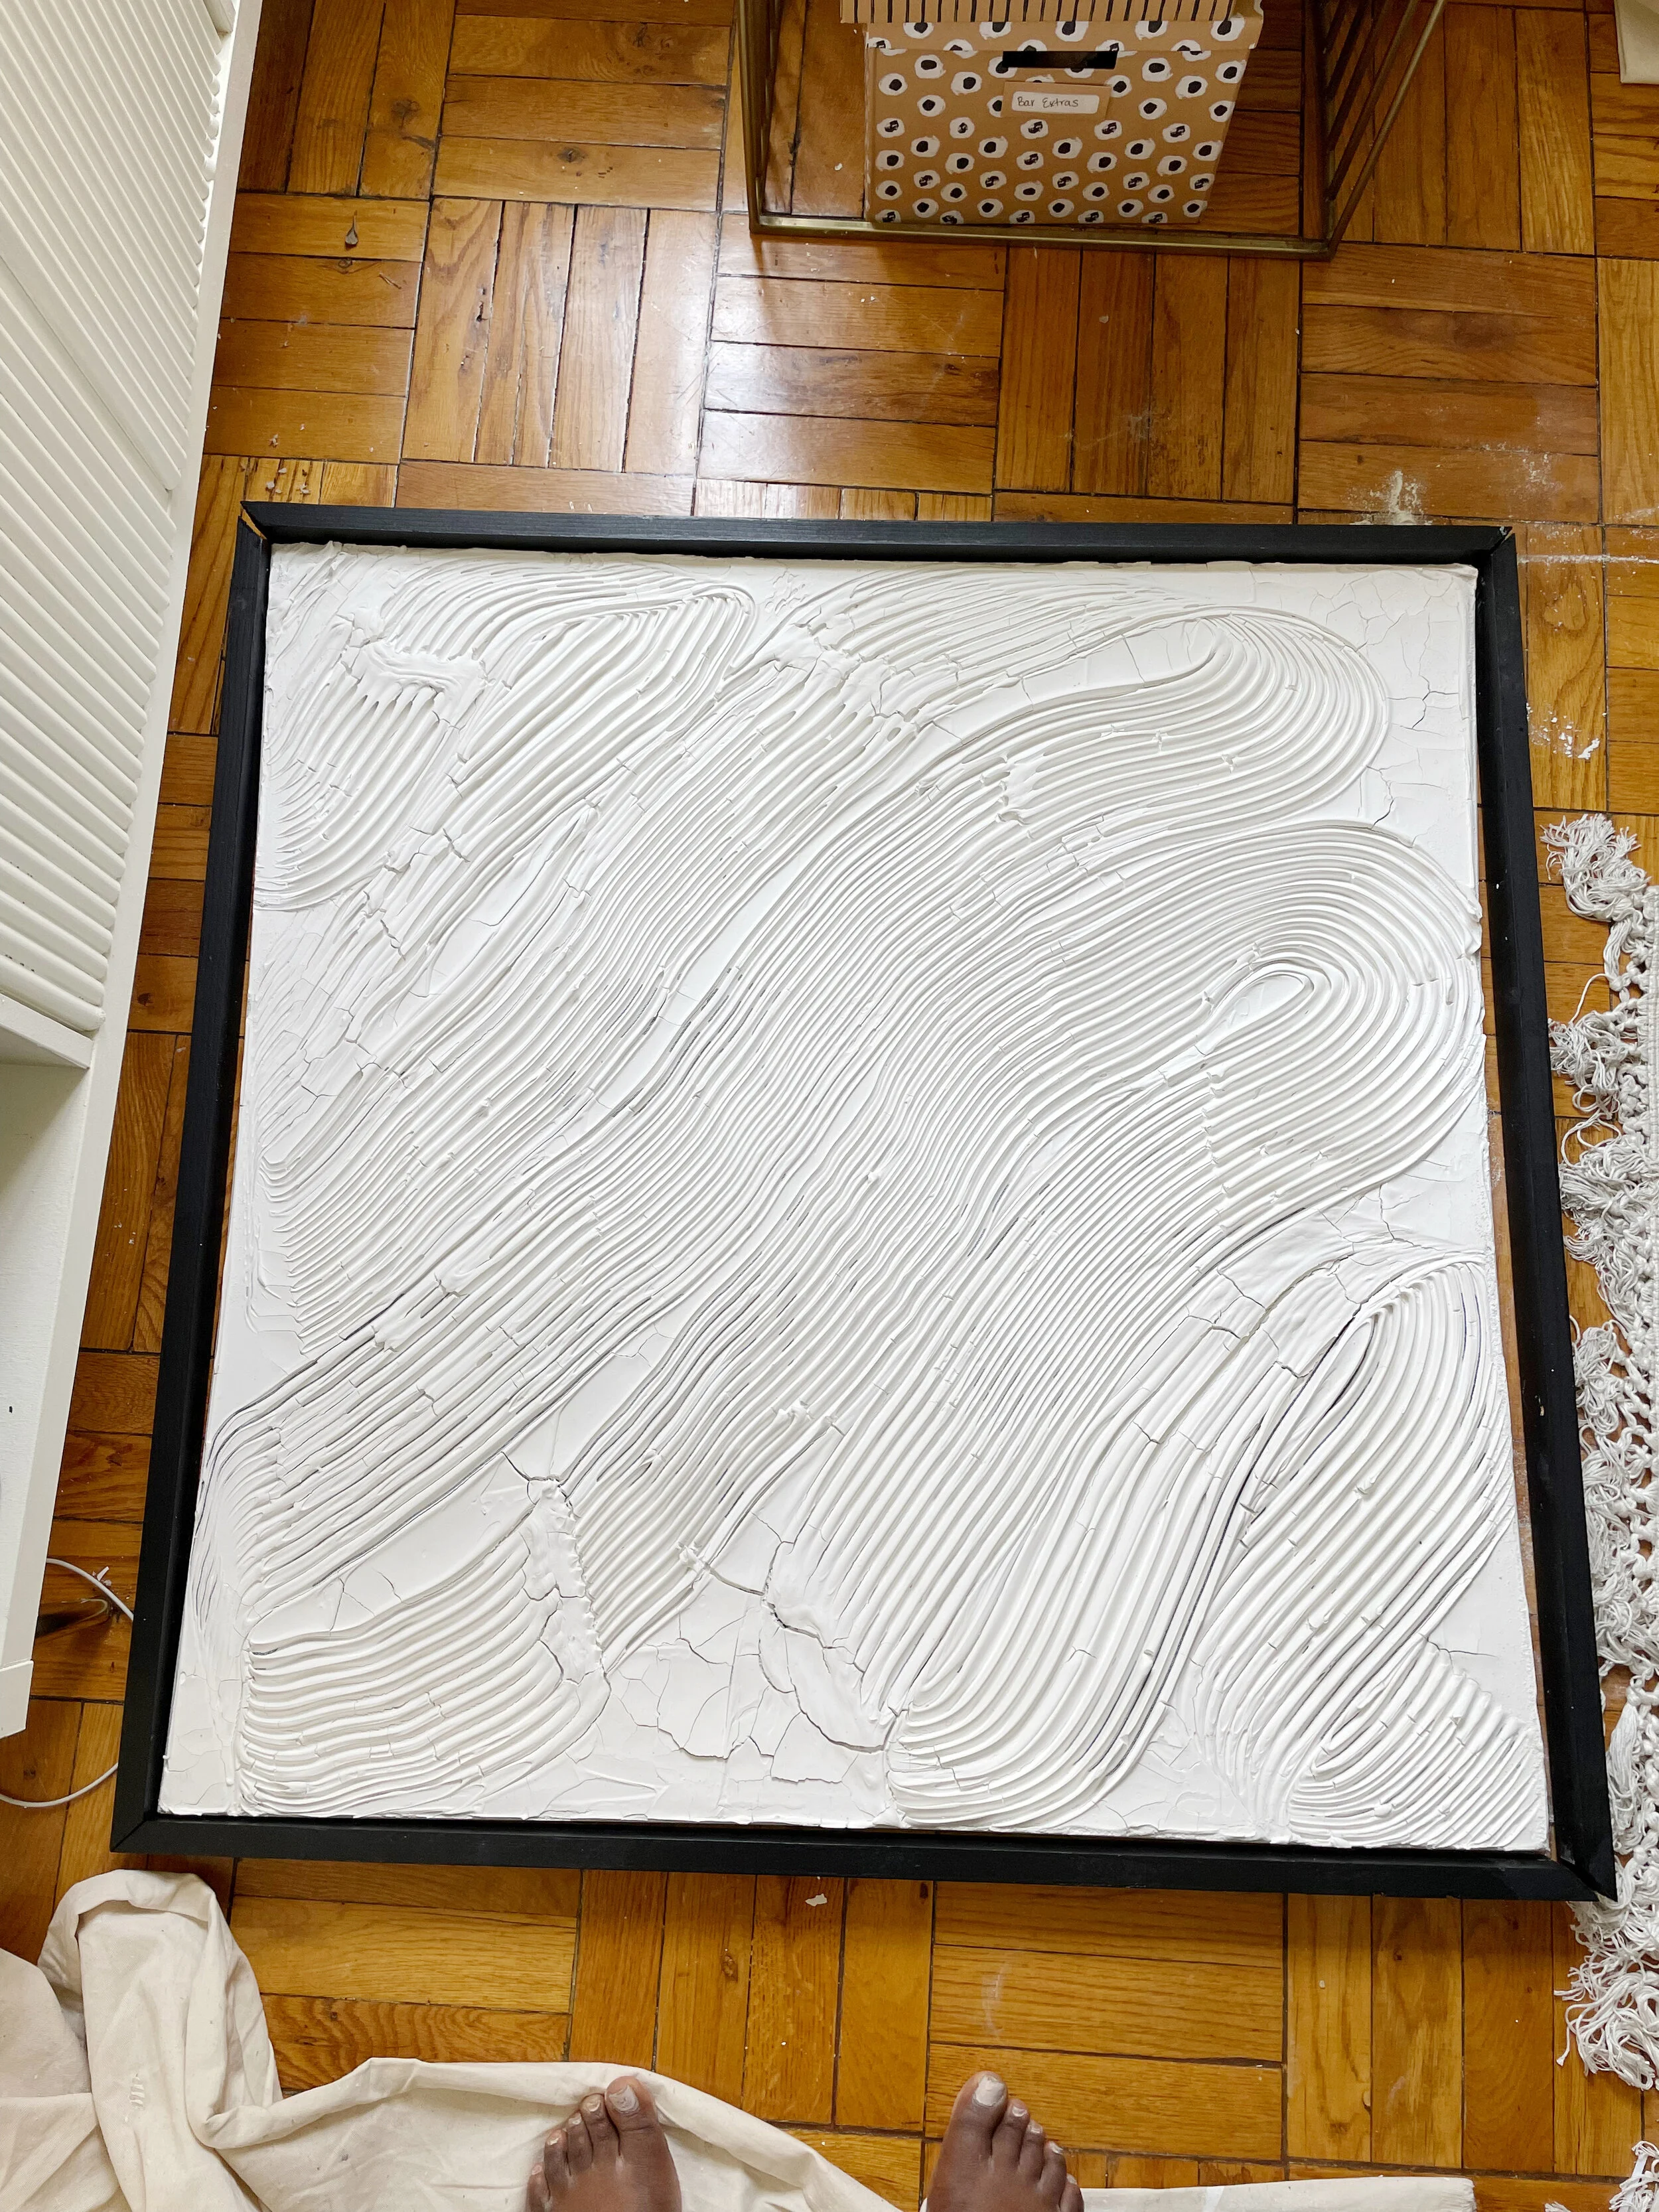
Textured art is very of the moment. Luckily it’s also extremely easy to make. I’ve had this large pop art from IKEA that I outgrew. Originally, I was going to post it for sale but the size was actually just what I needed for where I wanted to hang it. Instead of buying a new canvas, I thought why not upcycle this one for my textured art? Here’s how I did it:

Canvas art from IKEA

Create the frame and paint in desired color

Cover with joint compound using drywall scraper

Sand excess dried paster to get a smooth edge

Draw your design into the plaster
Fit frame to your newly created art
PRO TIP: Shop big box stores and vintage stores for cute frames. Even if you don’t like the art, you can always swap it out with something more of your style.
Lay your canvas on a flat covered surface. Make sure the surface is covered, this can get messy. I reused a canvas from IKEA.
Using a dry wall scraper, start spreading the joint compound into an even layer across the entire canvas. I used an entire 12-pound bucket of the premixed compound for this project.
Using an object of your choice, trace the design into the joint compound. I used a wide-tooth comb to achieve the swirling pattern I had in mind.
Allow the canvas to dry fully. With how much joint compound I used, It took a full 48 hours for it to dry fully since some parts were so thick.
Once the joint compound is completely dry, you can paint the compound if you’d like. My original plan was to paint the compound a bright white but I changed my mind for two reasons: 1) the compound dried to a bright white as opposed to the right tan that I expected and 2) while creating the pattern my comb dug all the way to the canvas some parts of the original art (the print of Audrey Hepburn) were visible in the swirls so I thought it would be cool to leave it like.
OPTIONAL: Create a frame for your new art using 1x2 common boards and a miter saw box. I used two 1x2 for my art. I cut the lengths down to the correct side and cut each end into a 45-degree angle using my miter box
I then painted the newly created frame pieces using leftover paint from when I was creating my accent wall.
While waiting for the frame pieces to dry, I used a sanding block to sand any excess dried joint compound from the edges of the canvas. This allows the frame to fit more tightly to the art.
Fit the frame to the canvas and secure the pieces together using wood glue and clamps. Let it dry overnight snd remove the clamps in the morning.
When hanging your art, make sure to use the correct wall fasteners. I ended up using three heavy-duty nails to hang mine up since this now weighed close to 15 pounds with the canvas, joint compound, and frame.
Anthropologie Pointillism Art Dupe
This project is part 2 of my TV Cover Art DIY. I saved this project for one of the last parts of my ORC because I wasn’t entirely sure what kind of art I wanted to create for this space. This art will hang over my TV and therefore will be a focal point of the room. It’s also 4 x 4.5 feet so it takes up a large part of the wall space in this room. Now that the room is closer to being complete, I’ve finally decided to recreate a piece of art I saw at Anthropologie a year ago.
This pointillism piece is simple but striking. It’s also $700 before shipping and tax. Given how often I redecorate, I didn’t feel comfortable investing that much on this one piece of art. But given how simple the piece was, I thought there was a good possibility I could DIY it.

The inspiration .

My blank canvas and a belini to get the creative juices flowing
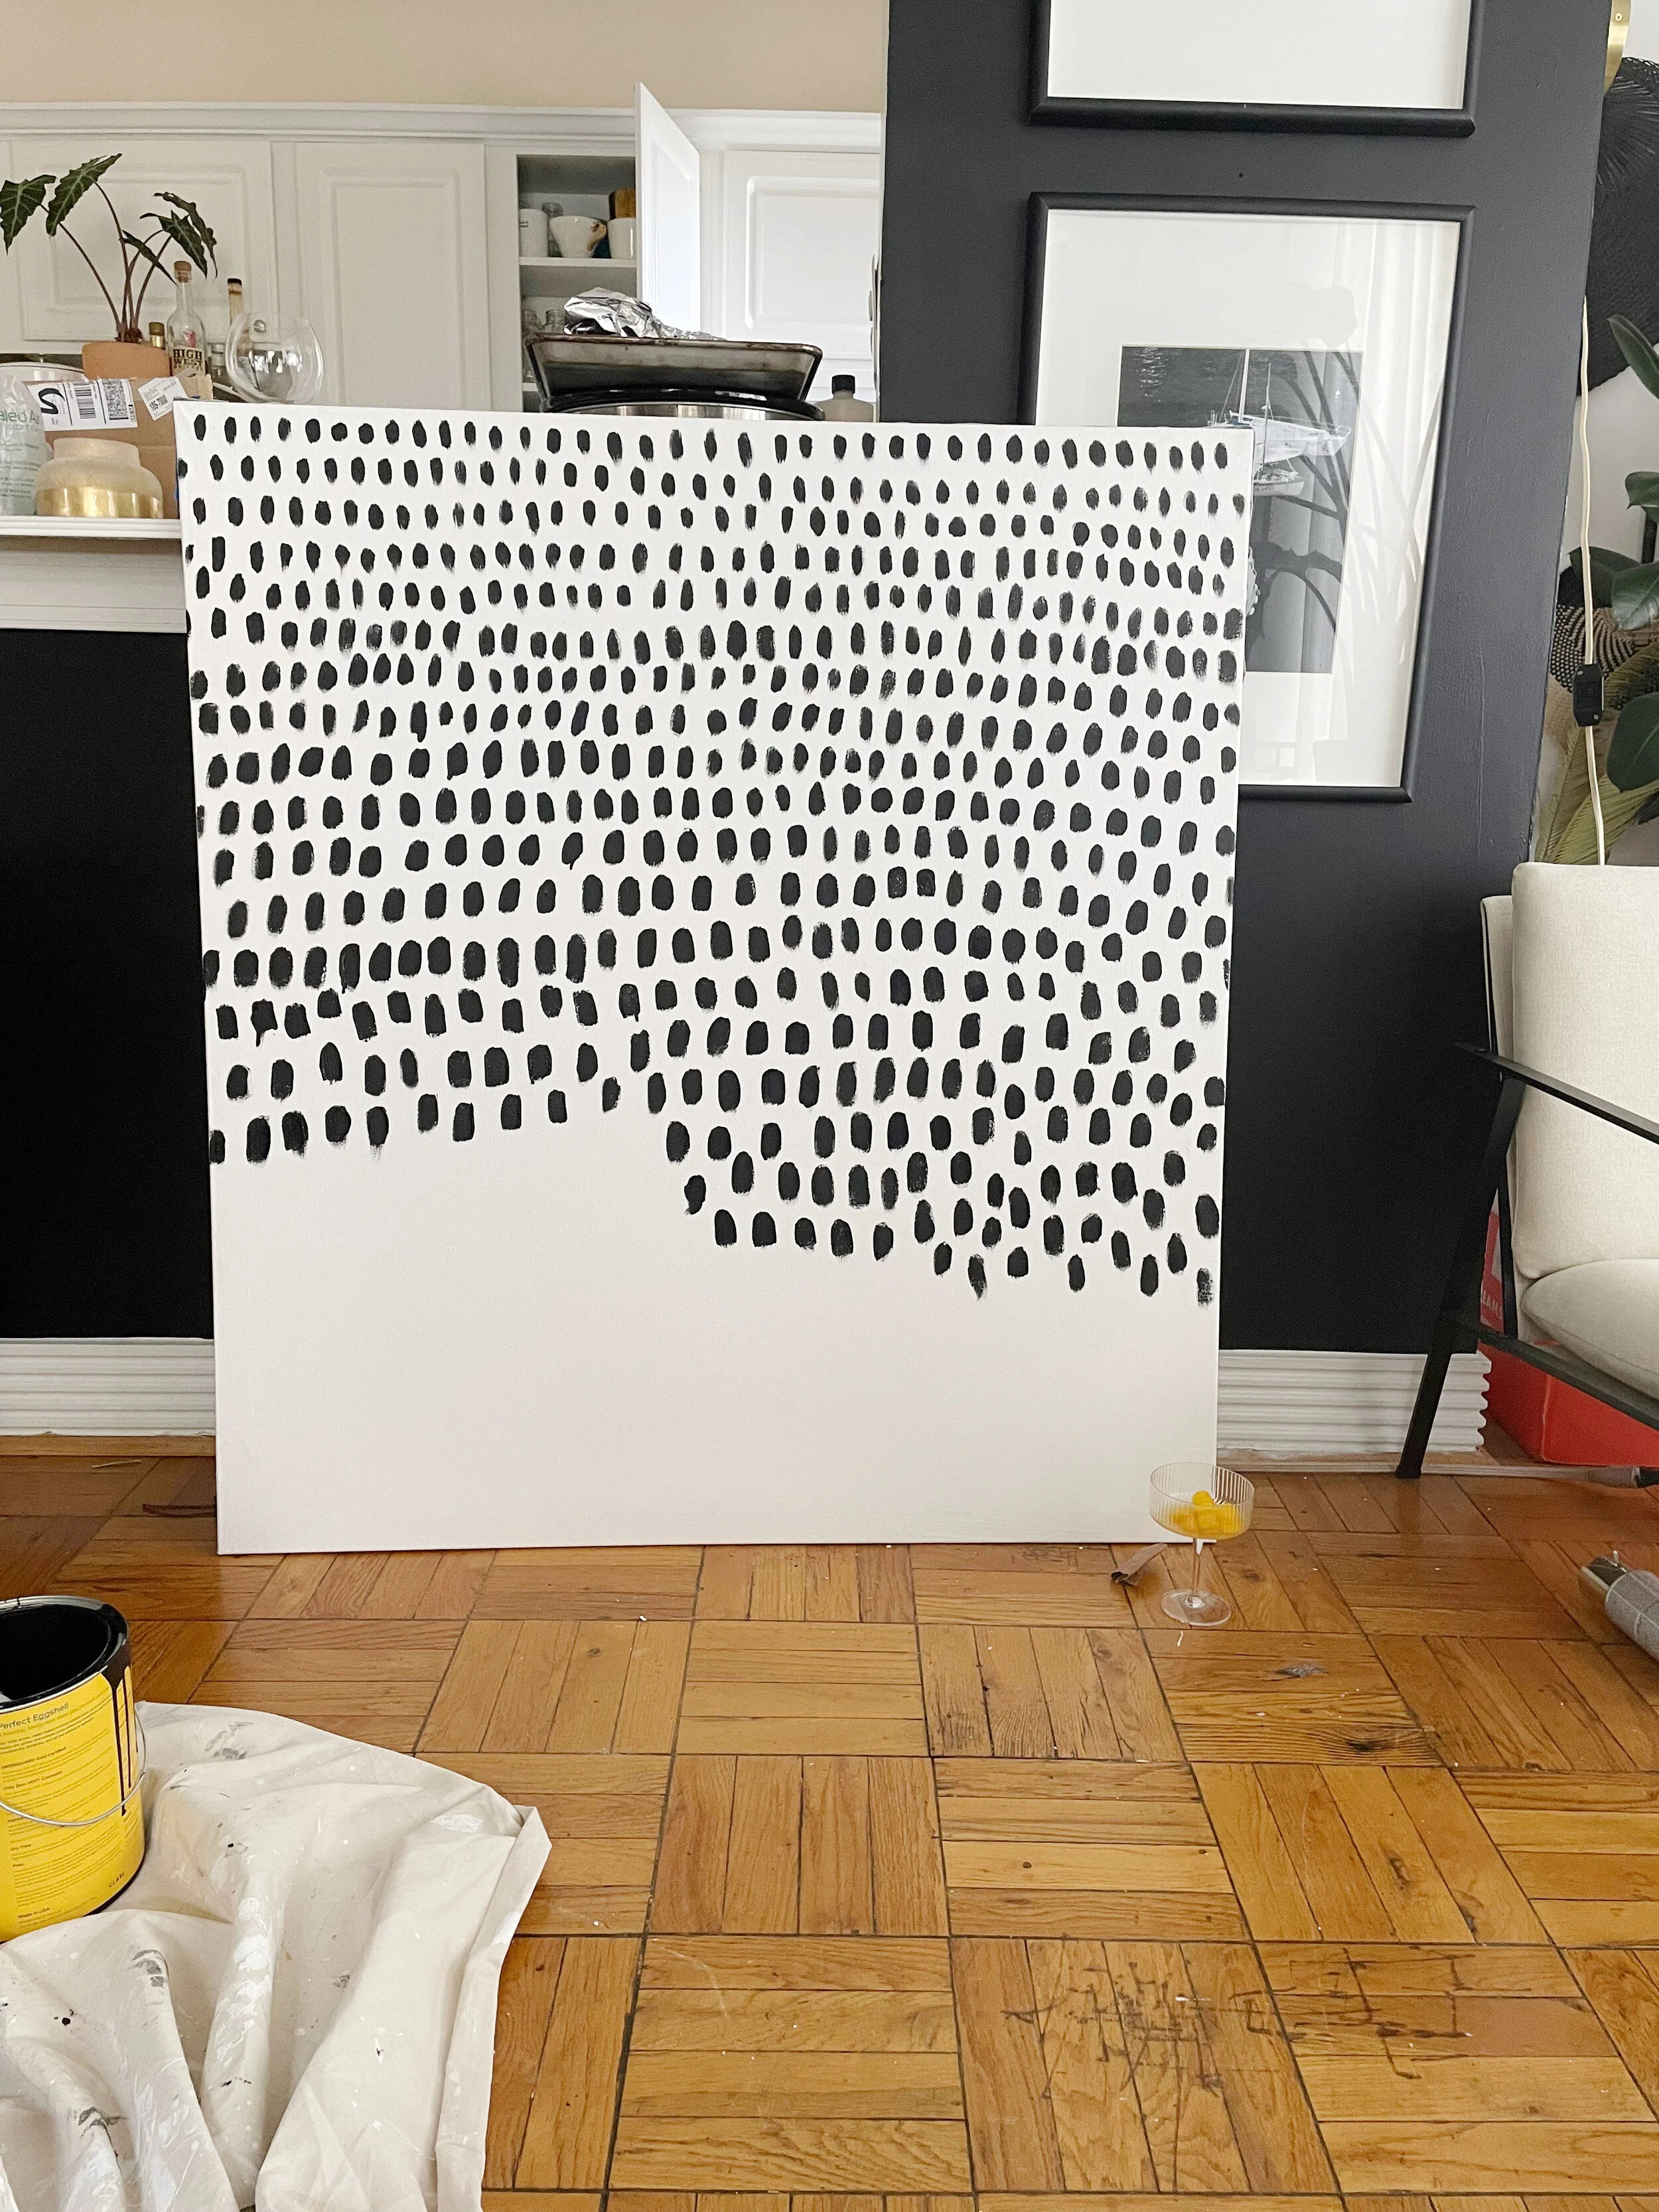
You can see my confidence (or alcohol consumption ) growing the further down it goes

Paint the frame in the gold color of your choice

Secure the canvas to the frame and secure using wood glue.

The final project!
Buy a canvas in the size you want or you can make one, like I did
Grab some black paint and use your medium size brush, paint small short strokes. Don’t be afraid of making them too small and uniform; apply the pressure to your brush so you get those bold strokes.
Repeat 200 more times
Make sure to not overload your brush or your strokes will have drip lines
Set the painting aside and let it dry
Paint the frame in the gold color of your choice, You can create an insight frame as we did for the textured piece above or a classic frame like I made here.
Once the frame and painting are dry, fit the frame to the canvas using clamps and wood glue.
Resources
Textured Art
Joint Compound (12 lb pre-mixed)
1x2 Common Board (2)
Canvas
Pointillism Dupe
Canvas (you can buy one or you can make one like I did)
Black paint (I used the color Blackest by Clare )
Gold Paint for the frame (I used a combination of several different paints to get this specific color)
Update on my To-do list:
To Do List
1. Build Faux Built In Bookcase
2. Create a cover for the TV
3. Fluted Bar Cabinet Makeover
4. Rewire and Revamp Table Lamps
5. Install Picture Light
6. Paint Room
7. Hang Curtains
8. Relocate and Paint Fireplace Surround
8. Create Custom Wall Art
9. Photo Gallery Wall

This post contains affiliate links. If you make a purchase through one of my links, I may receive a small commission at no cost to you.